Cartography - Southern_Land's Map Making Guide
How to create CC5 maps.
Undoubtedly some of you will read this and realise that there are vast gaps in
my knowledge, especially where using high-end paint programmes… I'm largely self-taught
and impatient… if you spot anywhere I'm doing things the hard way please tell
me. This is just an overview of the map making procedure.
Where to start?
I guess first you need an idea. For many people this means a map or photo, although
for a first map my advice would be to start from scratch. It is easier. When you
start with your own concept you aren't forced to choose between reality and concept.
Maybe put something down on paper or even plan your map with your paint programme
or just start, it all depends on how you want to work.
Step one. Decide on your map size. CC maps come in ratios of 120 pixels.
You set this size when creating the new image in your paint programme. CC3 maps
can range in size up to 2880x2880 pixel maps (roughly 650 metres game scale).
Examples of this size are Ukraine, Belarus and Gumrak. CC5 maps are able to be
created up to a size of 3720x3720 pixels. Unless the map is a multiple of 120
pixels it won't work in 3C for coding and certainly won't work in the game. Don't
waste your time, get it right first time. A good starting size is 1800x1200, not
too large, not too small
Step two. Design your map. Personally I seldom design plans in advance
unless I'm doing the map for someone else. I get a mental overview more based
on what I'm hoping to achieve in terms of playability and go from there. Examples,
Statefarm79 I started with the river as I wanted to use free deploy to set the
Soviet deployment zone in the north. Katapaa was the lakes, I wanted a narrow
isthmus where I could channel Soviet armour against light Finnish forces. And
one of my favourite maps, CauMt5 wanted steep hills in a zigzag valley to make
it tank unfriendly. That's why patches of the hills are coded with courtyard,
tanks can't go there yet it doesn't impede LOS.
Some things seem right, you'll know as you do them. But don't play by the rules.
Some people apparently start thinking about terrain features with the roads. I
prefer to begin with the streams or rivers, just like nature. Once the watercourses
are in place you know where the hills are going and if you've taken any notice
of your surroundings in REAL LIFE you'll guess where to put the roads, bridges
and villages as human nature follows real nature. The principle design feature
of my maps (especially the early ones) was to jumble up the LOS to give the poor
AI half a chance.
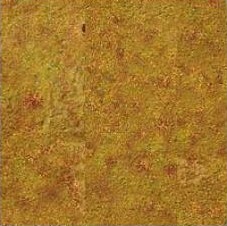
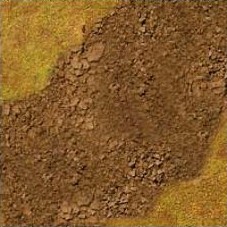
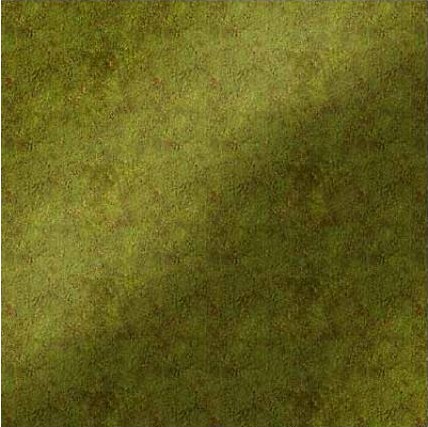
Step three. Base terrain image. Essentially you have a number of options here,
grass, cc5 grass, dry summer grass, mud or snow. I've made a few attempts at creating
new terrain types but I feel they don't fit aesthetically into scenarios or campaigns
when suddenly one map has different colours.
Obtaining your basic terrain is easy, put an existing .BGM file into a folder
with the cc2tga .exe and double click on the .exe. In seconds you have generated
a targa (or .tga) file that your paint programme can recognise. Once you've created
a few .tga's you've got all the stock you need for wholesale map creation. You
have streams, roads, hills, buildings and so forth enough for both cut and paste
maps and for building your own texture pools.
To create the base image I have used two options. The first and easiest is to
define a pattern i.e. marque off a rectangular section and fill your map with
it. (In photoshop it's edit, define pattern, on an existing map then edit, fill
on yours…) The downside is that this option can cause problems as it can leave
a tile effect across your map unless the marqued off section is reasonably uniform.
To prevent the tiling effect hit the "edges" with the clone tool with the same
pattern. The other option is get a tga of an existing map with large areas of
bare terrain (Moscow2, Kursk3 embank and so on) and copy an irregular patch (with
a 5 pixel feathered edge) and paste. Okay it's slow but it gives diversity to
your map terrain. This is how all of my early maps were created.
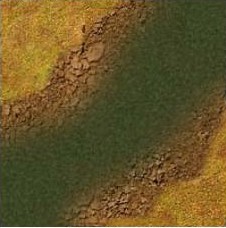
Step four. So you've got a plain, it's green, or brown or snow, there are
zero terrain features and it'll be no fun to play on. Next step for me is to add
rivers. The easiest way is simply cut out river sections off existing maps. Use
a 3-5 pixel feather to give a soft edge and paste them onto yours. You can stretch
them, shrink them, rotate them and do what you want. Just remember a water course
is generally lower than the surrounding terrain so shading comes into play. Shadow
on the left, light on the right… easy! The slightly harder way was to create a
river is to get a mud-like texture and fill a river course with a 2-3 pixel feather
edge. Then make a smaller marqued off area with a 10-12 pix feather and fill it
with "water". This way where the water is semi-transparent it appears shallow.
Easy!!
Step five. Hills. Like everything there are several construction options.
The simplest is to cut existing hills from other maps. Again marque it off with
a healthy feathered edge 12-15 copy and paste. Remember the rules about shadow
when rotating, don't expand too far or the pixels turn to crap and so on, basically
just common sense. The other method I use is doing the shadow side first, marque
off with a 25 pix feather to give a nice soft edge, drop in a new layer (photoshop)
paint it black and reduce the opacity to 20-30%..
|

|
|
|
Darken the side away from
the sun, I generally create the area feather it to 15 to 20 px, add a
new layer and fill it with black then reduce the opacity. I find around
20-22% opacity for a hill shadow but don't take that as gospel. Have a
play with it and see what works for your map.
|
Lighten the sunward side
using brighten/contrast control. I generally give things a push of about
15-20.
|
Or you can use the grey scale method but I've never got my head around that… And
it seems you're expected to plan things out in advance… like Hell!!!
Cool so far. All you've needed is a paint programme and the cc2tga freeware programm.
No DOS, no hex editing, no nothing… How easy is that?
Next are other hills, buildings and roads. Exactly the same techniques apply.
Cut and paste. Use feathering. Blah, blah, blah. The only handy thing I've discovered
for hasty village creation is this little sneaky thing.

|
|
|
Paste a building from another
map, copy its shadow too regardless of colour. This building was cut from
the Rostov map, the shadow is dark brown and doesn't work with the green.
|
Mark off the shadow and
fill it solid black cut it, then paste it back and reduce the layer opacity
to 35%. Ã 35%
|
 |
| Then when something is pasted
or filled underneath it is affected by the shadow. This way I can drop a
building a minute onto a new map. Fast eh? And lets face it, once you come
to grips with your paint programme you can change the colour, size and so
forth. This only downside with this method is that you can't rotate the
building as it screws up where the shadow falls.
|
Step Six. You also need trees, again several ways. You can copy sections of
woods from other maps, don't rotate them, shadows falling towards the sun just
look stupid. One of the best resources is the tree shadows pack by GS Marcks.
It's a .psd with about 30 tree shadows, copy and paste: repeatedly.
If you want to create a forest a shortcut is to create and small psd (say 200x200
pix), fill it with trees, turn off the background and go copy merged. This gives
you a 200x200 pix block of trees that you can stamp over your map by pasting repeatedly.
Then just add some extra trees to randomize the look.
Common… all together now… EASY!!!
Another option is to create your own shadows. I've found whereas building shadows
look best at 35% opacity, trees shadows generally need a little more darkness,
40-50%, sometimes more especially if you're creating a mud map like the Korsun
series.
Okay there's plenty of other things you can do but essentially now you have your
very own map.
When you save it save as a 16bit .tga. (Go save as, find the tga format and after
a while the programme will prompt you with three choices 16, 24 and 32 bit).
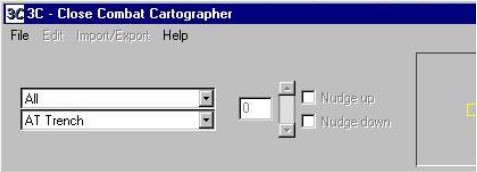
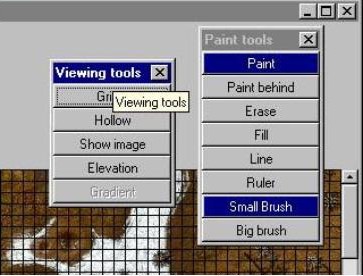
Time to unzip and open the amazing programme called 3C. Open it and using the
file menu, load the tga.
|
|
|
| The menu currently reading ALL
gives major groups, say trees or wooden buildings, the menu beneath it gives
subgroups, say conifers or big trees wooden walls or wooden doors. You "paint"
these elements over your map slowly obscuring your masterpiece with swarthes
of flat colour. Once the entire map is coloured (every square, in fact use
the fill unfilled under edit to ensure that every square is full) it's time
to do the elevation i.e. make the hills and hollows.
| Actually a good way to see how
3C works is open the program, load one of the original .bgm files from your
maps folder, open the same map's txt file and you will get a complete overview.
I've got to repeat… every single square in the map MUST be coded for elevation
as well as element; otherwise… fzzzipppt, it won't work!!!!!
|
Okay, everything is almost ready. Save the txt file to the same place as your
tga. Go to import/export menu and save the bgm, mmm and ovm files the same way.
This takes a few seconds each.
The bgm is the map you play on, the ovm is the larger map you see in the senerio
editor and the mmm is the small one at the lower left corner of your screen as
you play. Now comes the time consuming one, the LOS file (defining where your
troops can see and shoot once they’re fighting), this generally takes about 30
mins for a reasonable sized map. It’ll pay not to do anything else while this
is happening… I went on line while generating the LOS for Statefarm79 and it took
4 hrs. It’s a mistake you only make once. The better your computer is the faster
this process becomes. I recently doubled by processor speed and the amount of
RAM and the Los production time halved.
Often now I play the map to test it. Then add a few more buildings and trees to
confuse the LOS a little further. Of course this means back to 3C but if you’re
going to do it, do it right and it’s just a matter of reloading the tag and txt
files and editing the differences, then resaving everything.
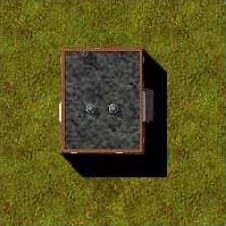
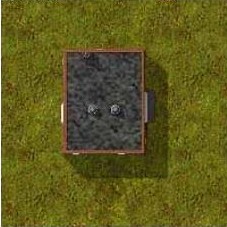
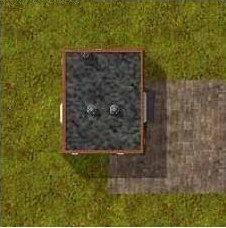
Final Step. The rfm files. These are the tiles that let your troops enter
buildings. Open your tga again using the paint program and start filling in the
buildings with interiors.
|
|
|
 |
|
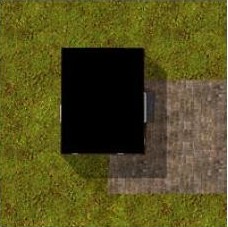
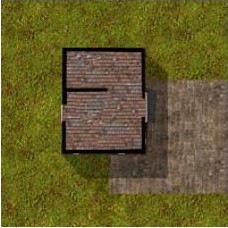
This,
|
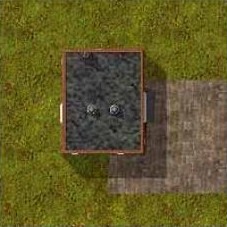
and this,
|
becomes this.
|
Through copying and pasting or filling. “Hollow out†every building and save the
map as a 16bit tga with something that identifies it as an interior file. DON’T
JUST SAVE OVER TOP AS THAT MEANS LOTS MORE WORK REDOING YOUR EXTERIOR MAP AGAIN!!!
AND OF COURSE I HAVE NEVER BEEN STUPID ENOUGH TO DO THIS.
Unzip then open Groof2. Open the interior map .tga first, after 20-30 seconds
it’ll prompt to open the exterior tga. The images will be one on top of the other,
you can swap between them if you want. Then just marque out each roof and when
you’ve finished save the resulting rfm file to your new map’s folder.
At this stage you should have 8 files, 2 tgas (now worthless) a bgm, mmm, ovm,
rfm, txt and a LOS file. Copy them to your closecombat 3 map folder and start
fighting.
CC5 maps are essentially the same, just a little harder to slot into the game
but using the search function at www.militarygameronline.com and asking the right
questions should bring up what you need to know.
Told you it was easy Any questions to southern_land@hotmail.com
Resouces
CCtree the texture files created by Gds_Starfury
exe
3C
Groof2 (don’t use Groof as the second version is a lot more stable)
(refomatted to fit on this webpage) Copyright © by Close Combat Series All Right Reserved. Published on: 2005-06-26 (6197 reads) [ Go Back ] |