Posted: Sat Oct 09, 2010 9:42 am Post subject: Arnhem West Approach- Vickers MG destroyed
Our Vickers MG was trapped and fought to the last against overwhelming enemy numbers.
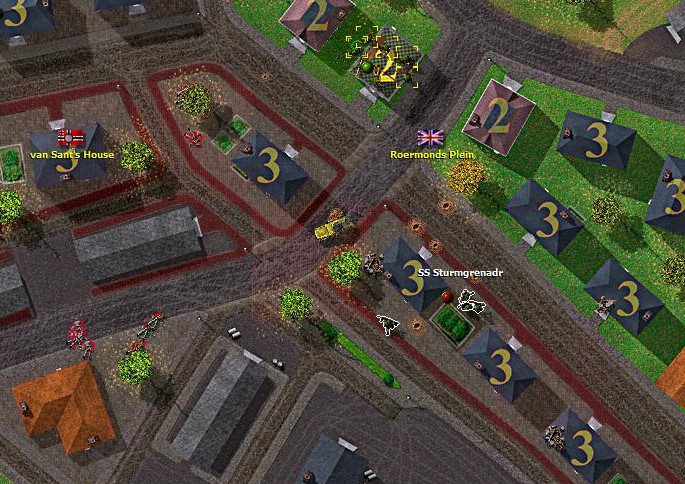
Right as the Germans thought that our flank has crumbled, their AC move forward far too recklessly and was destroyed by our PIAT team. We quickly rush a Rifle team forward to support the PIAT and stabilised our flank.
Posted: Sat Oct 09, 2010 9:58 am Post subject: Arnhem West Approach Clear!
After stabilising our flank. We move forward to the counter attack.
Both Recon and Rifle teams moved in mutual support and retook the van Sant's House and to Arnhem VLs. The enemy troopers, demoralised after their heavy losses, surrendered en-masse. We have an excellent victory.
Posted: Mon Oct 11, 2010 1:24 pm Post subject: Nijmegen Bridge Teams and Start
We head back to Nijmegen Bridge, securing our previous gains and clearing more terrain.
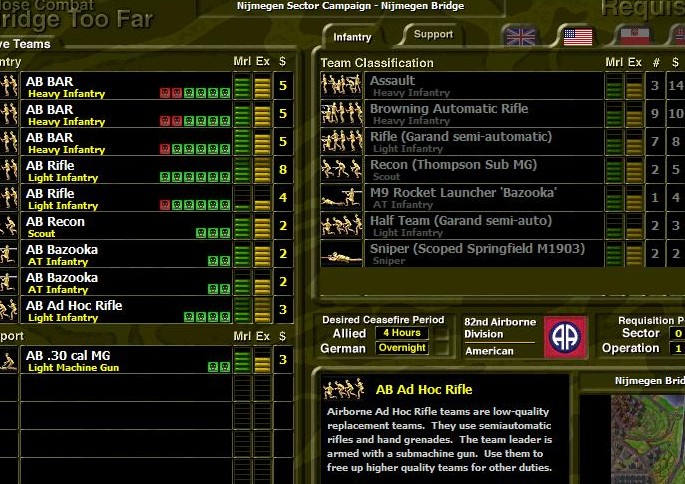
During the pause of 4 hrs, we took on more infantry reinforcements of 1 Rifle and 1 Ad Hoc teams.
We position our teams to first overlook areas that are yet under our control and will systematically flush the enemy from the buildings around the VLs to the top of the map, working from the bottom up.
Posted: Mon Oct 11, 2010 1:30 pm Post subject: Nijmegen Bridge- Our cordon grows
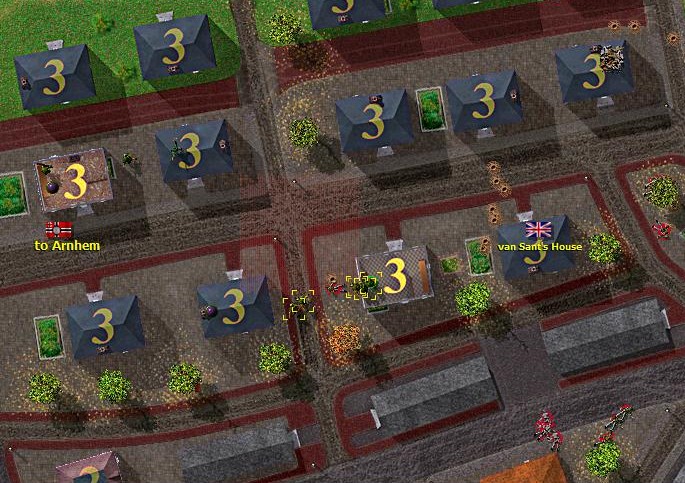
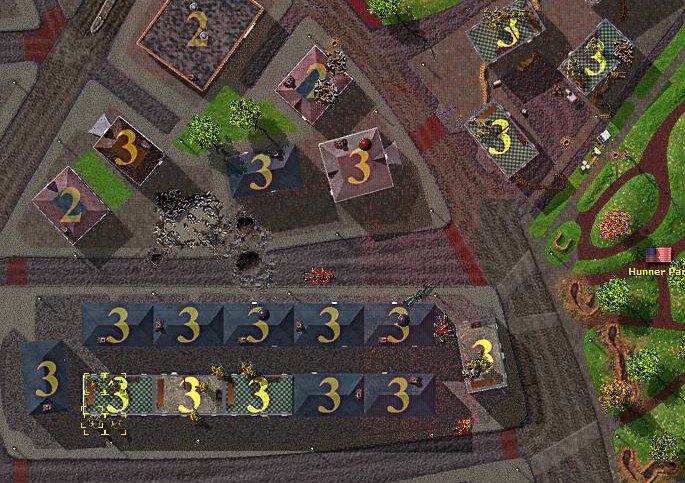
We rush and overwhelm the enemy with the speed of our attack. We quickly destroy a MG 42 and Reserve team by taking them from both directions at the same time.
Without giving the enemy space to pause and breathe, we succeed in closing down all their options.
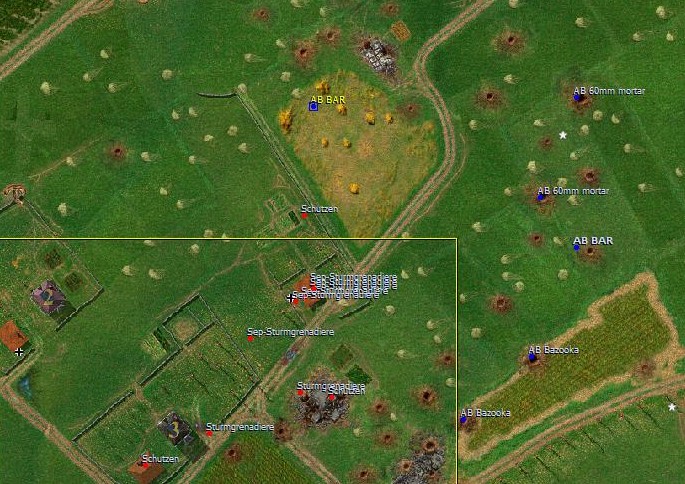
Once we clear most of the built-up area, we begin to sneak our Ad Hoc team into the park towards the riverbank. The enemy will be expecting our assault from the main force, they'll not be prepared to receive our Ad Hoc team grabbing the VLs.
2 Assaulting the enemy.jpg
Description:
The enemy is assailed from different directions simultaneously
Posted: Mon Oct 11, 2010 1:35 pm Post subject: Nijmegen Bridge Captured!
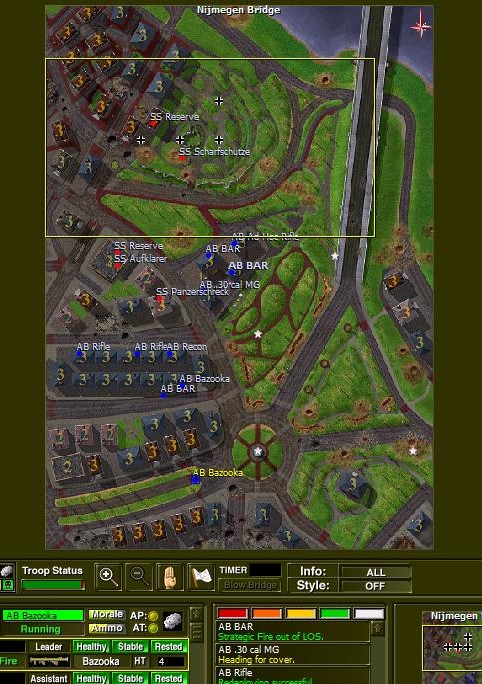
There was very little need to feint. The crust has already been broken through. We push our teams forward, covering each other. The final enemy was a Scharfschutze.
We have succeeded in capturing Nijmegen Bridge. XXX Corps will only need to bring up the boats for an assault crossing to secure the far bank. That should occur by mid of 3rd day.
4 Approaching the enemy's last positions.jpg
Description:
Our troopers scenting the moment of victory
Filesize:
160.67 KB
Viewed:
11035 Time(s)
5 Final Assault.jpg
Description:
The final attack before Nijmegen Bridge is cleared
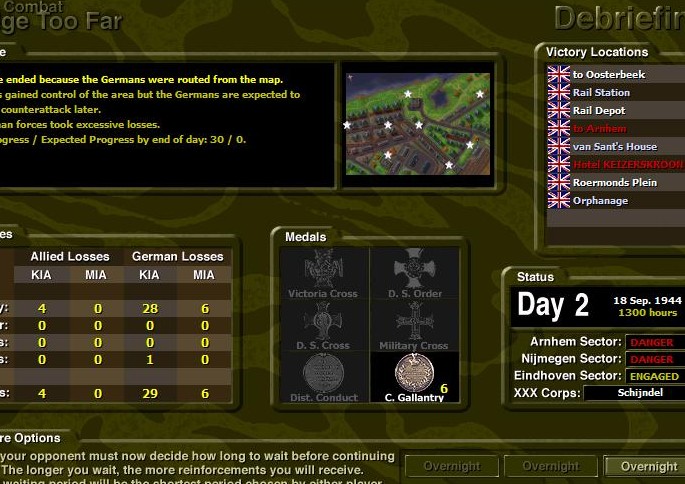
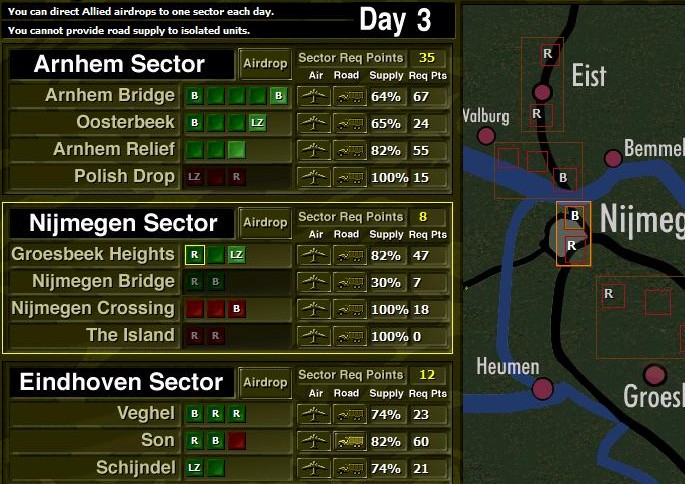
Posted: Tue Oct 12, 2010 3:21 am Post subject: End of 2nd Day and 3rd Day Supply
Let us review our objectives and actions for the 2nd day.
Arnhem Sector
1. Primary Obj achieved with control of Arnhem Bridge. Destruction of Arnhem Rail Bridge not affecting mission yet.
2. Secondary Obj achieved with control of Oosterbeek LZ.
3. Secondary Obj achieved with control of Arnhem West Approach, in the Relief Op. Col. Frost is not isolated and will receive additional 20 req. pts.
Nijmegen Sector
1. Primary Obj achieved with capture of Nijmegen Bridge.
2. Secondary Obj achieved with control of Groesbeek LZ.
Eindhoven Sector
1. Secondary Obj achieved with control of Schijndel Dunes, in Schijndel Op.
Heading to our 3rd day, we decide to support air-supply for Nijmegen Crossing Op and land-supply for Son Op.
We had anticipated the enemy to attack with tanks and once we spotted it, the order was given, to silently withdraw. We'll keep ourselves in better shape to fight them.
This is grist to the mill in the debate about being able to withdraw from maps. In the later versions of the game you'd have to stay and be slaughtered.
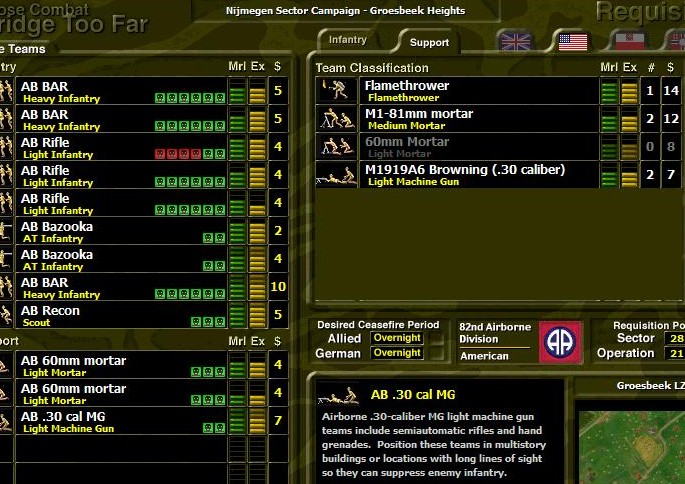
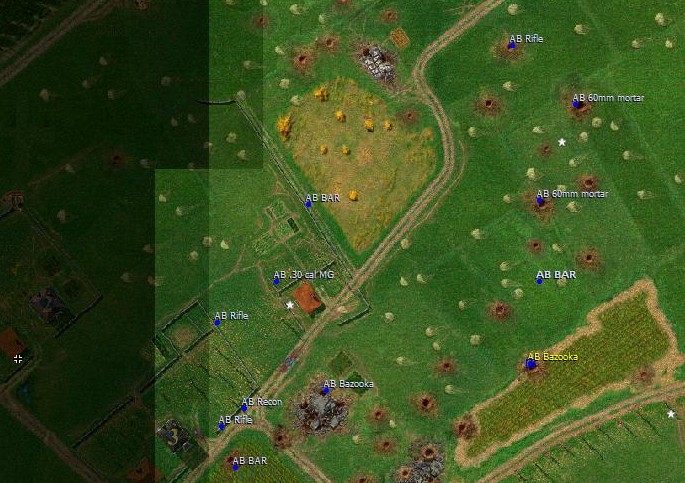
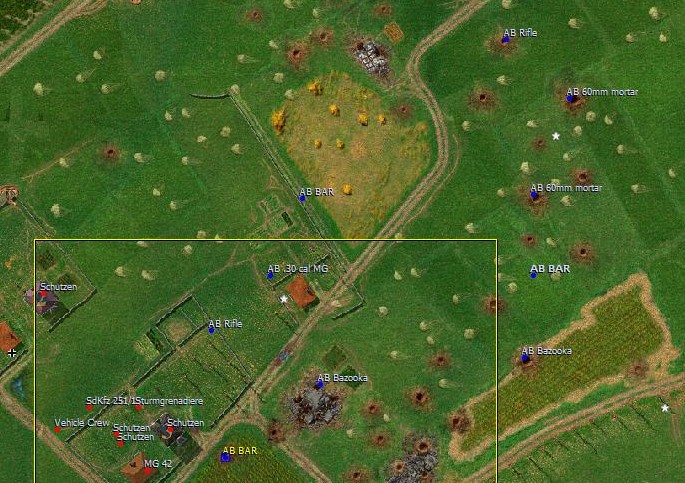
Posted: Sat Oct 16, 2010 11:09 am Post subject: Groesbeek LZ Teams and Plan
The enemy has launched another dawn assault to take the LZ.
Overnight, we have strengthened our forces with 1 team of the following types, BAR, Recon, Bazooka, and .30 cal MG.
The plan this morning was to spoil the enemy concentration by leading our attack into the vicinity of the villa. To that effort, we have placed 1 BAR, 2 Rifle, 1 Recon to conduct this assault. A BAR, .30 cal MG and Bazooka team will support them.
We keep the rest of the teams in a reserve line, just in case things should go wrong.
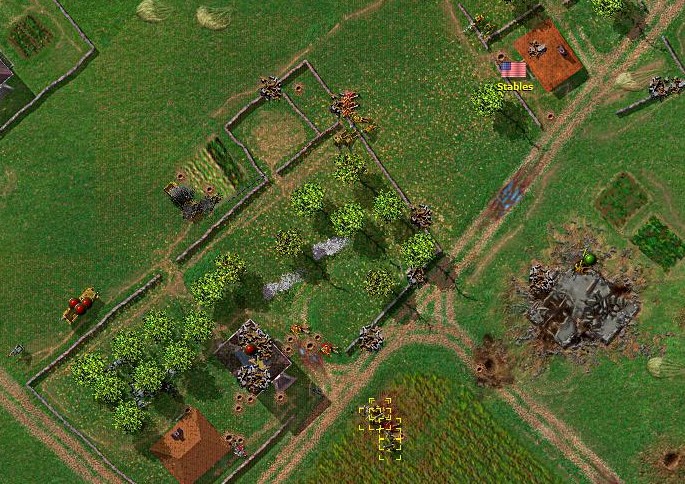
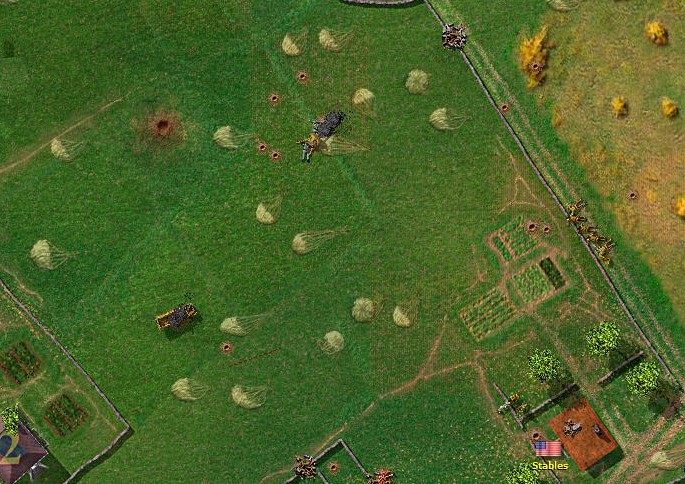
Posted: Thu Oct 21, 2010 4:28 am Post subject: Groesbeek LZ- Enemy heavies
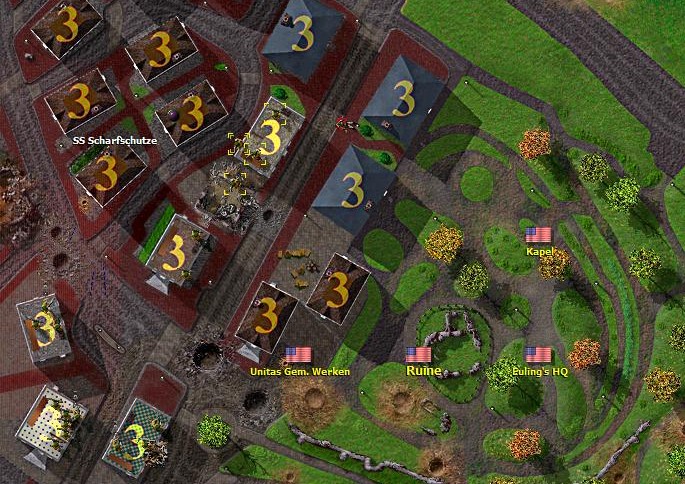
As anticipated in the previous day's fight, the enemy had some heavy equipment to play with.
Here, they brought along 3 HT and a Anti-Tank Gun.
We have to quickly destroy this fellas if we hope to sustain our assault. We concentrated our fires to take them out as they came into the open. And after some brisk work, knocked them all out.
2 Assaulting the Villa.jpg
Description:
2 more HT near the villa
Filesize:
173.31 KB
Viewed:
10970 Time(s)
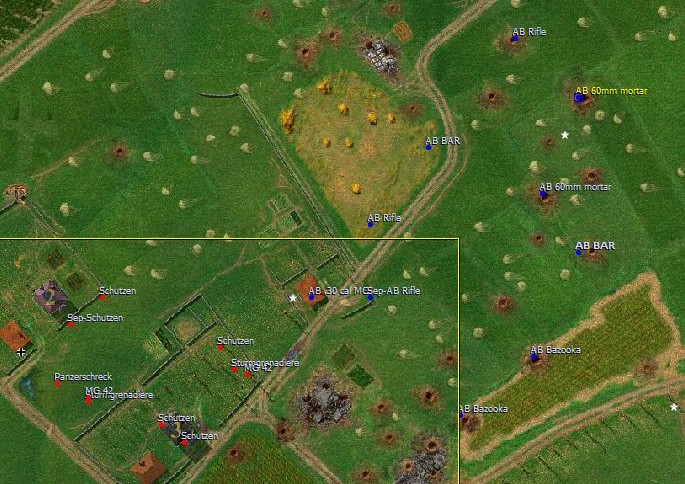
4 Destroyed ATG and HT.jpg
Description:
Both HT and ATG fell victim to our accurate shooting
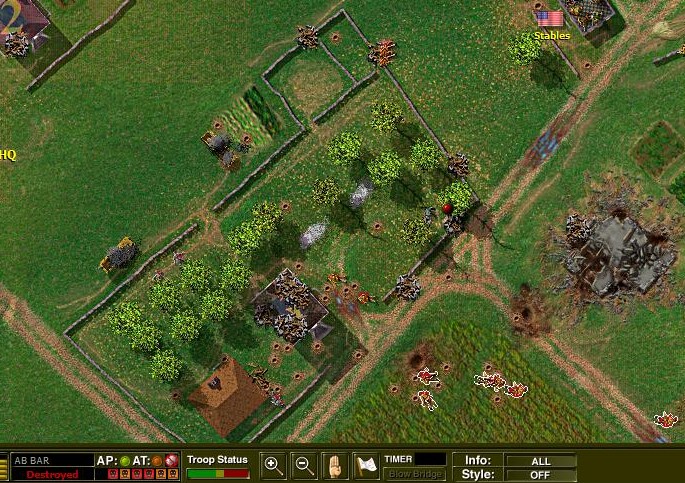
Posted: Thu Oct 21, 2010 4:32 am Post subject: Groesbeek LZ- Bloody Villa
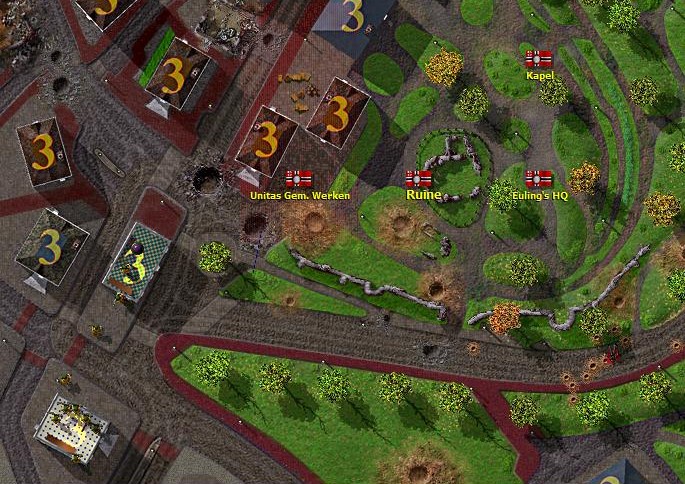
Our Recon team was the first into the villa but before they can reorganise themselves to cover all approaches, the enemy stormed back and retook the villa.
We decide to cede control of the building once we lose the accompanying Rifle team. It's time to back off and pull back to our second line along the Stables VL, where our .30 cal MG would be able to anchor the line.
3 Loss of Villa.jpg
Description:
Enemy counter attacks before we can consolidate our defence in the villa
Posted: Thu Oct 21, 2010 4:37 am Post subject: Groesbeek LZ- Complete loss of Assault teams
Perhaps we moved too slowly, or perhaps the enemy was just buoyed by their successful actions in the villa. They pursued our teams as we tried to break contact but we weren't successful in breaking cleanly enough. Here we suffer the complete loss of the assault teams, 1 BAR, 2 Rifle and 1 Recon.
We tried to regroup near the Stables VL, where our MG team is able to stiffen up the line.
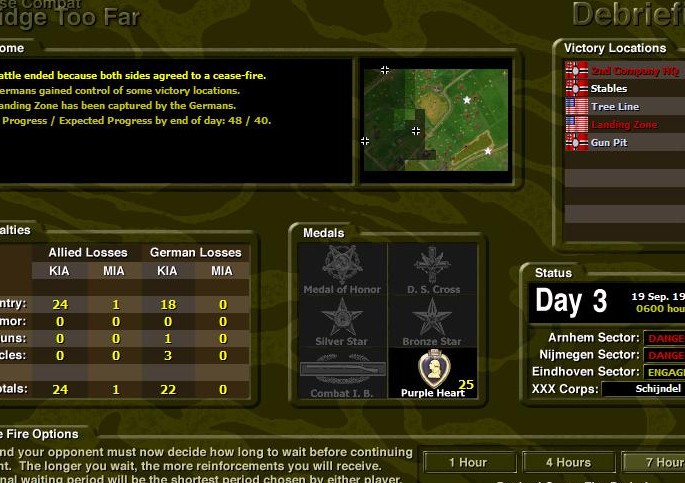
Posted: Thu Oct 21, 2010 4:48 am Post subject: Groesbeek LZ- Ceasefire
It was no good. As our mortars fell silent due to insufficient ammo, the enemy stormed forward again and carried the Stables VL. Our 2nd Line was swept away.
With that, we decide on asking for ceasefire terms and the Germans concurred. Though the enemy had only gained 1 VL, we had already lost the initiative here. The Groesbeek LZ is closed.
Posted: Thu Oct 21, 2010 9:05 pm Post subject: Re: CC2 ABTF GC
Ouch! Every time I play that map, it results in a bloodbath...
You know, I'm just a normal guy like everyone else. Why, my friends say, "Andreus you're just so cool because you're normal just like everyone else." Yep, normal that's me. - Fallout 2
You cannot post new topics in this forum You cannot reply to topics in this forum You cannot edit your posts in this forum You cannot delete your posts in this forum You cannot vote in polls in this forum You cannot attach files in this forum You can download files in this forum
In August of 2004, Zappi, Homba, Bambam887, RedScorpion and MOOXE all pitched
in to create this Close Combat site. I would to thank all the people who have visited
and found this site to thier liking. I hope you had time to check out some
of the great Close Combat mods and our forums. I'd also like to thank
all the members of our volunteer staff that have helped over
the years, and all our users that contributed to this site!