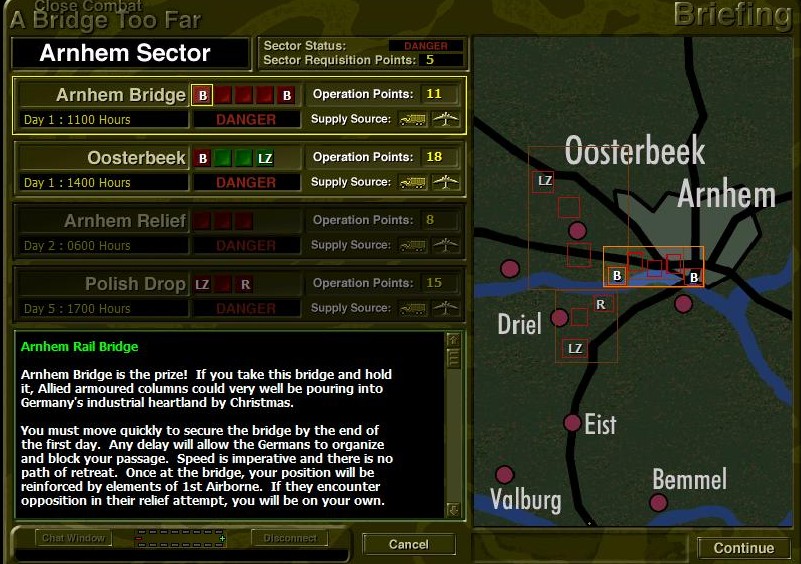
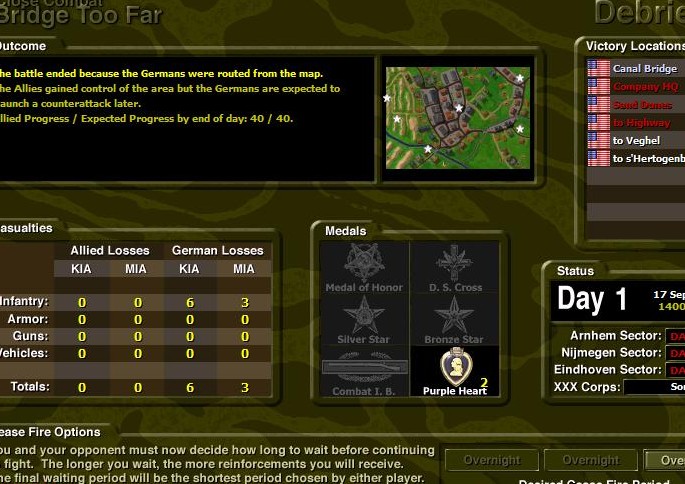
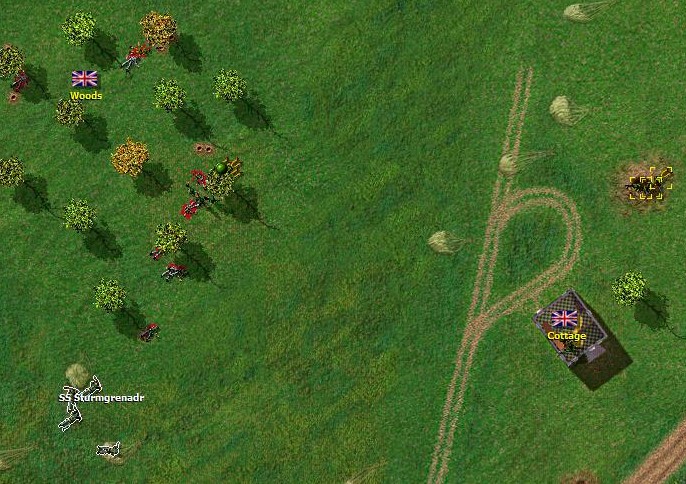
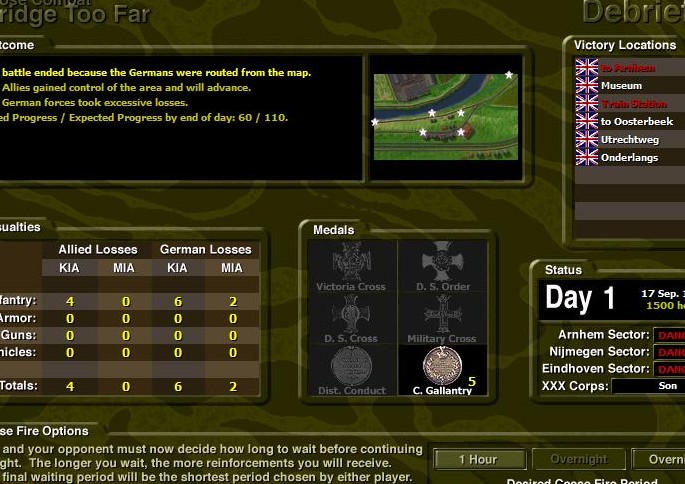
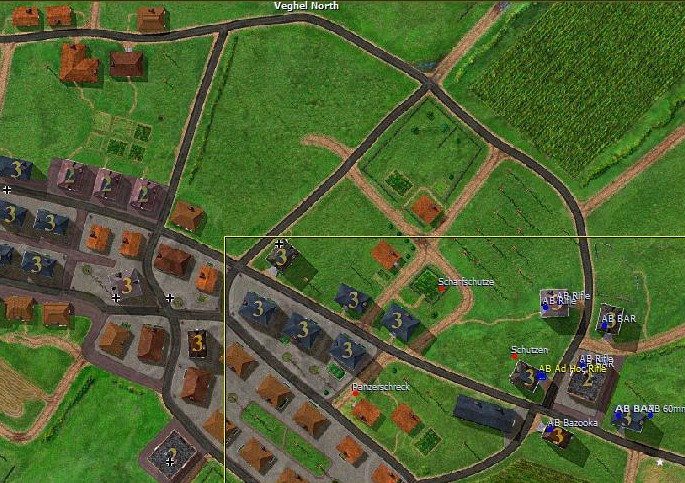
| 1 1st Day.jpg | ||
| Description: |
|
|
| Filesize: | 160.98 KB | |
| Viewed: | 13220 Time(s) | |
 |
||
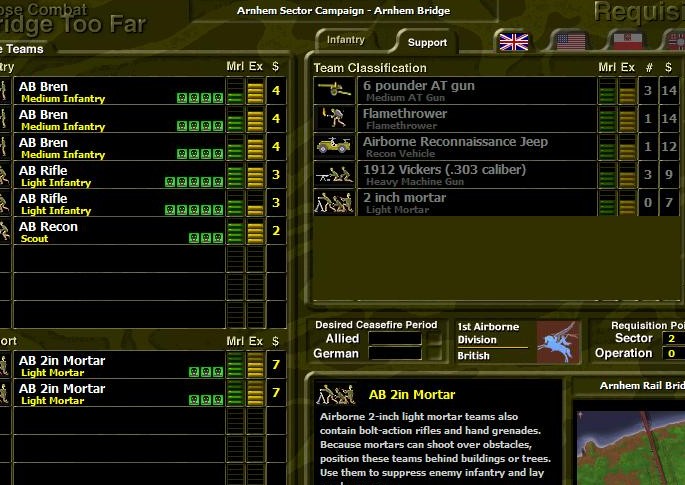
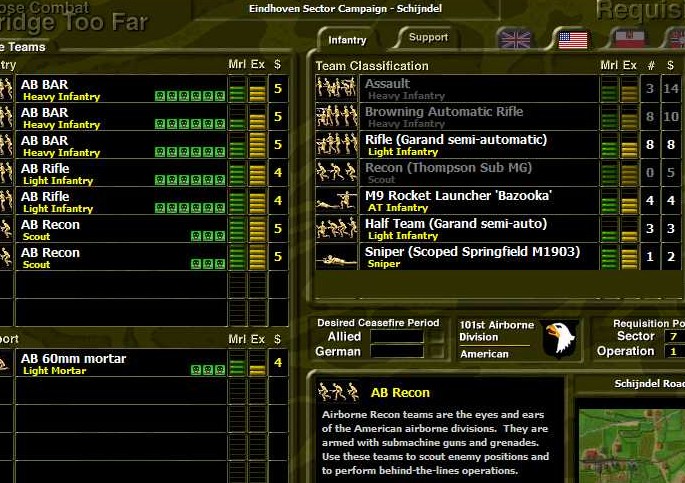
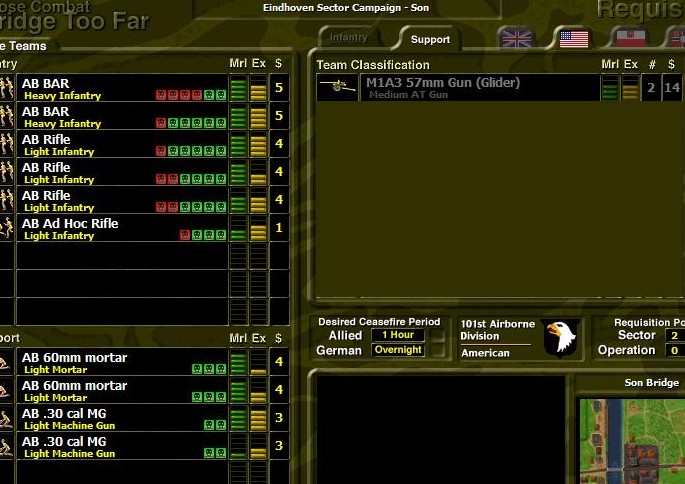
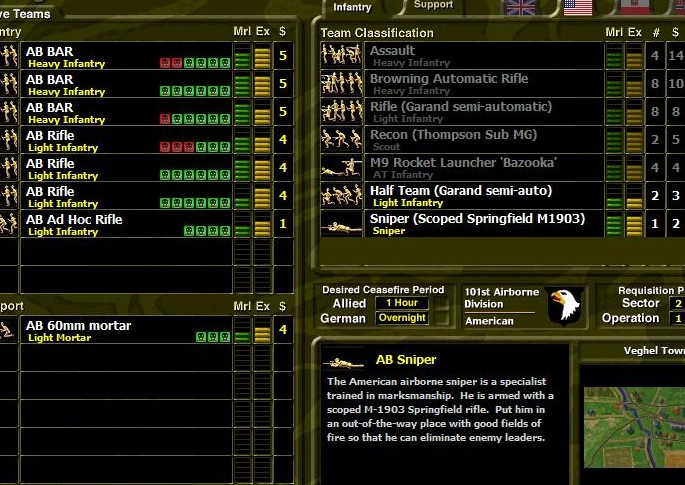
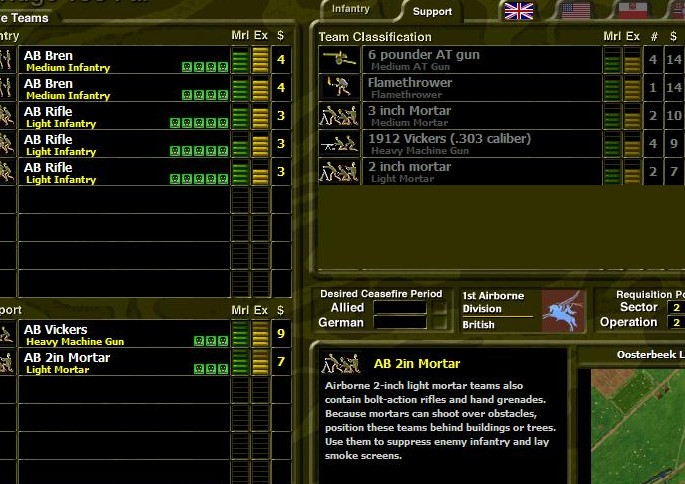
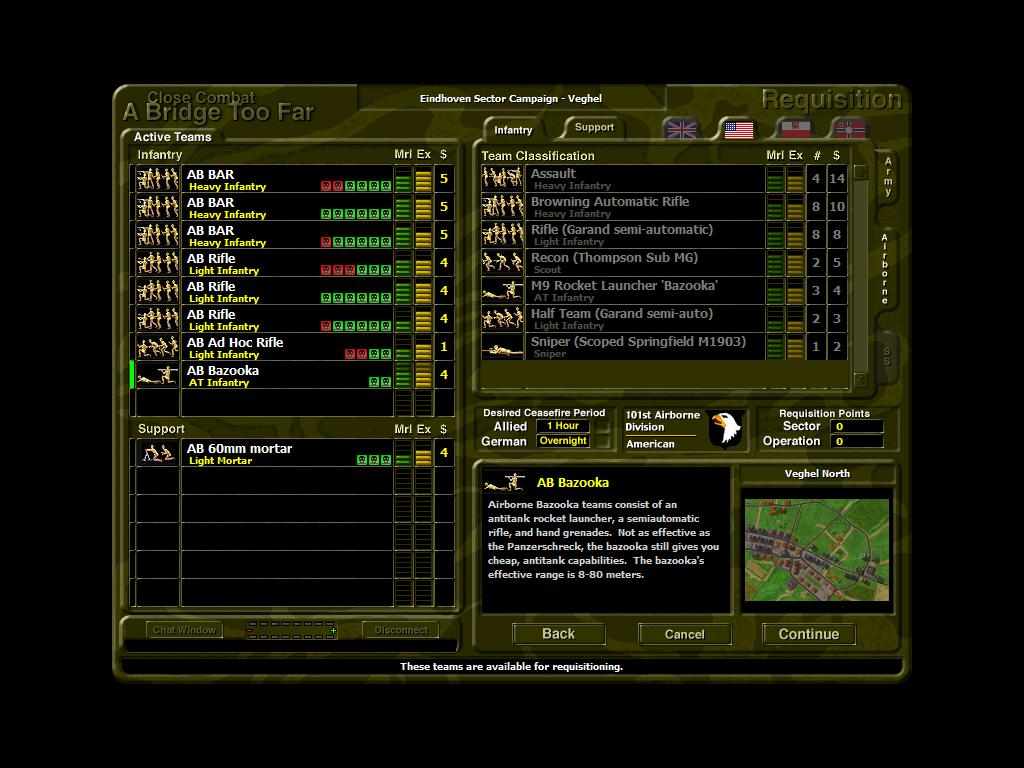
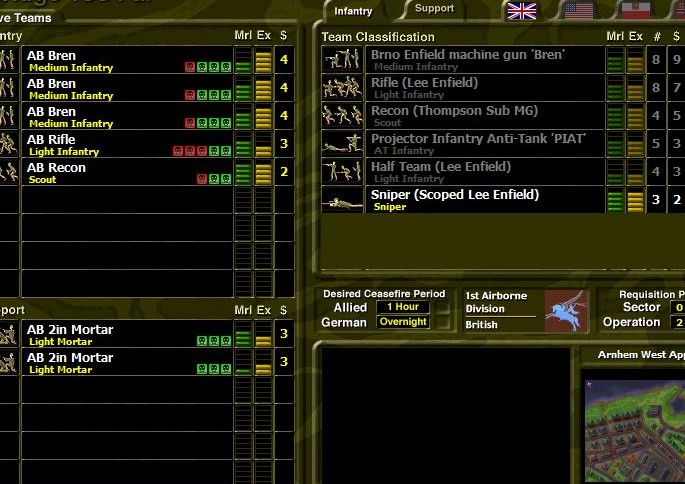
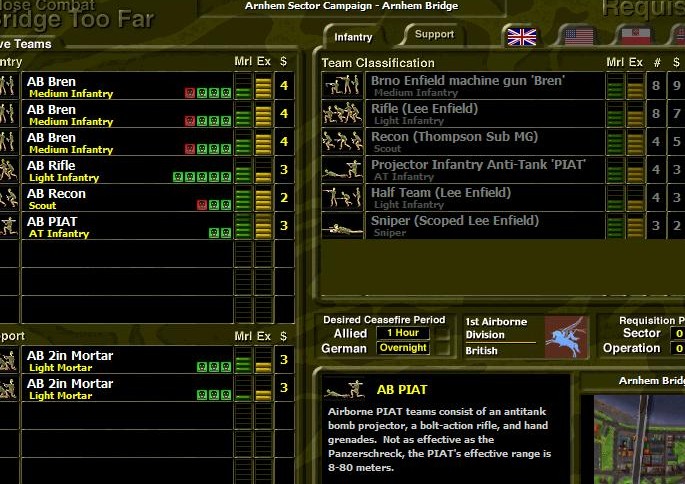
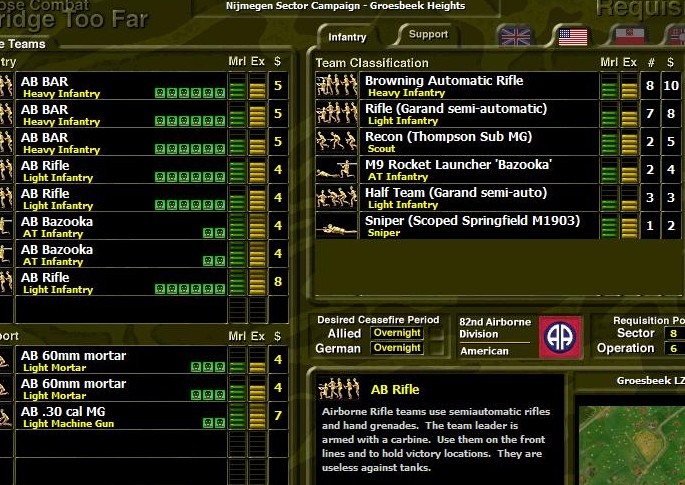
| OOB2.jpg | ||
| Description: |
|
|
| Filesize: | 113.43 KB | |
| Viewed: | 13219 Time(s) | |
 |
||
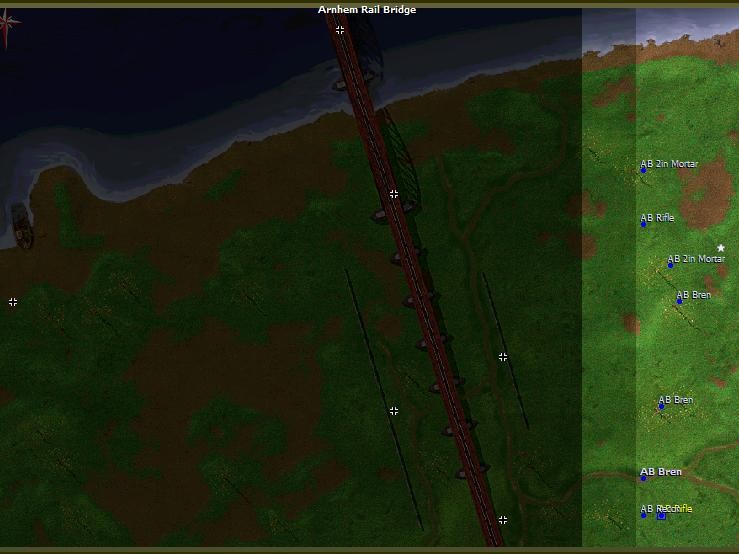
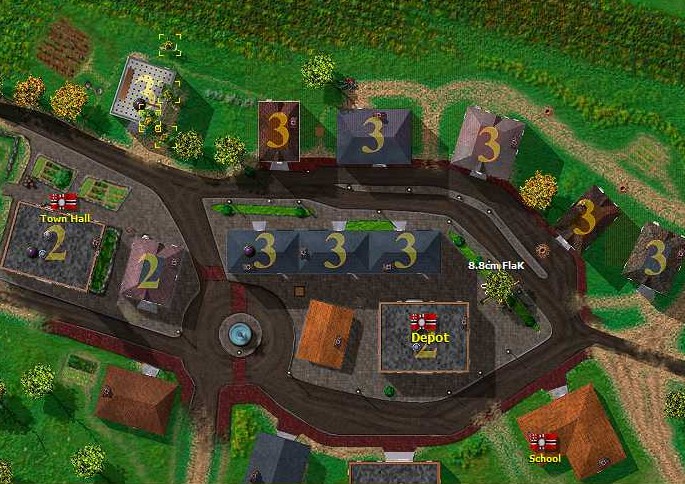
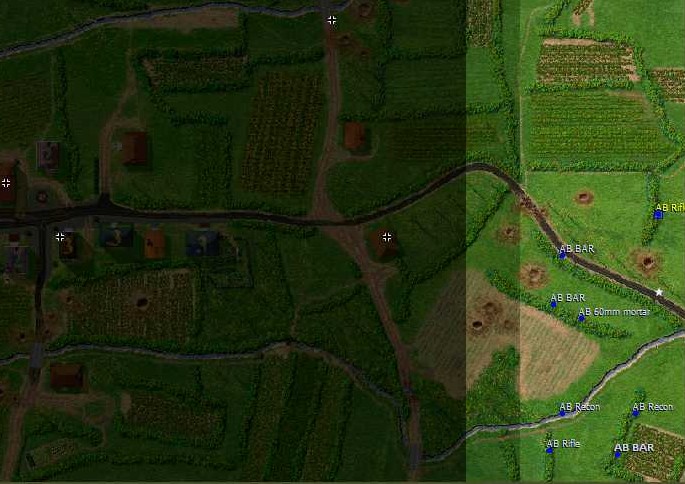
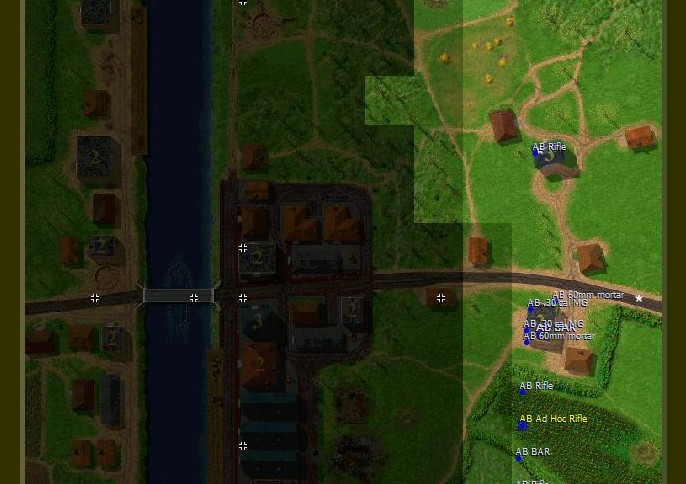
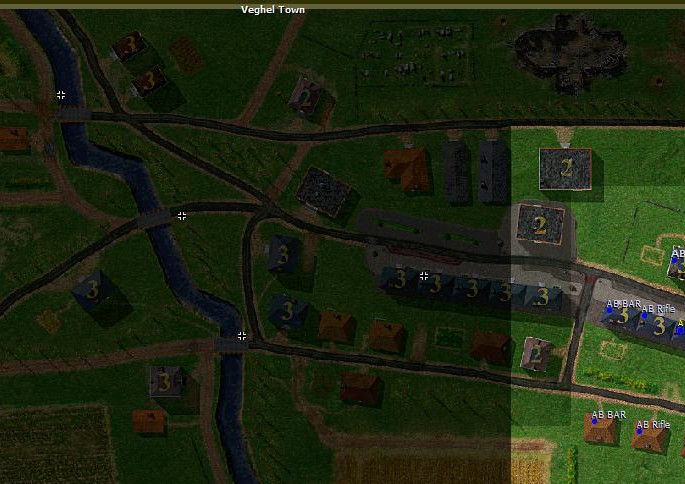
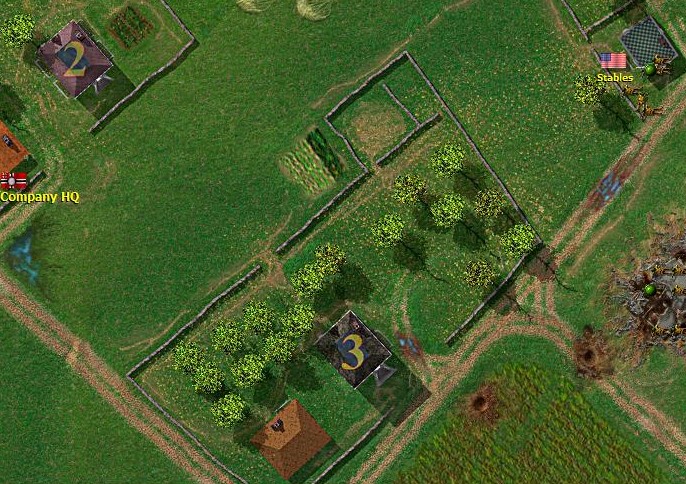
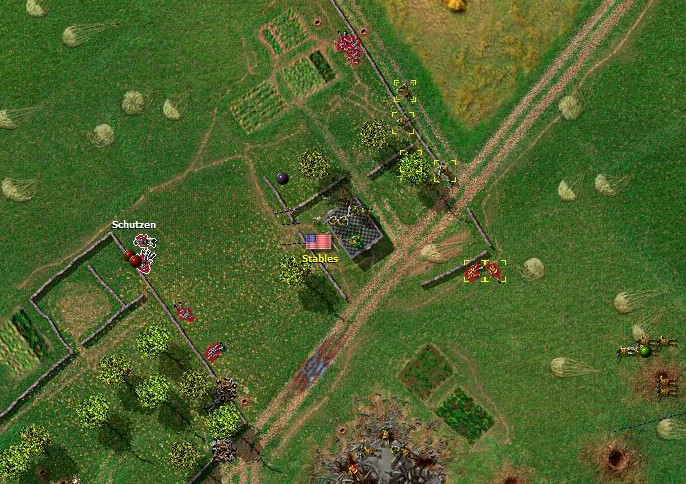
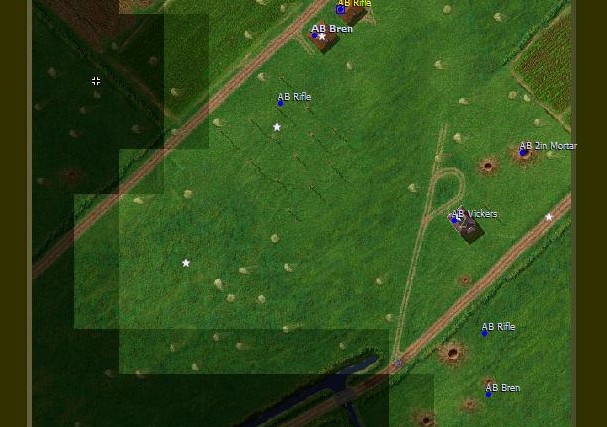
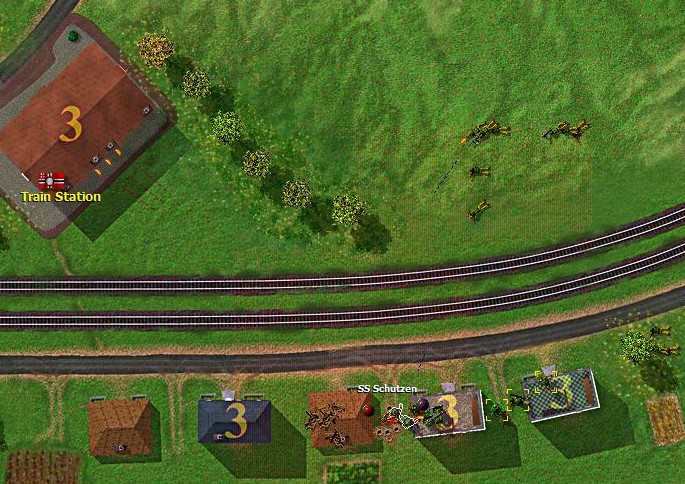
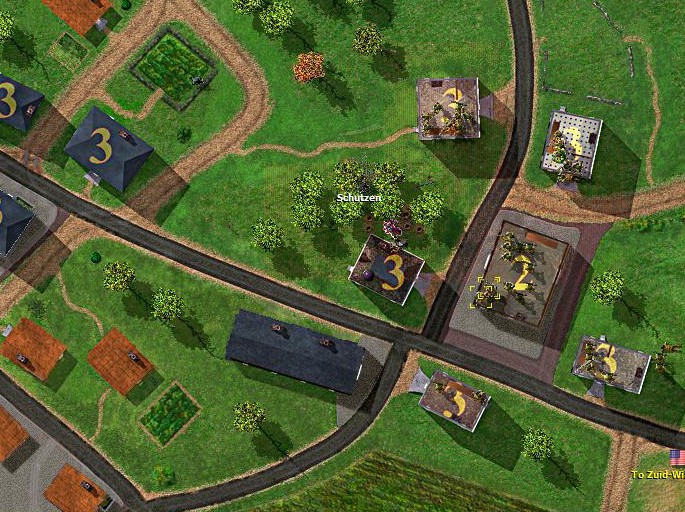
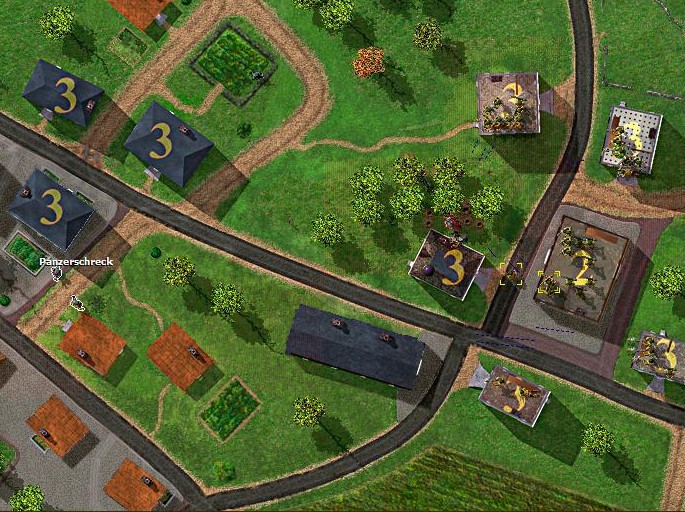
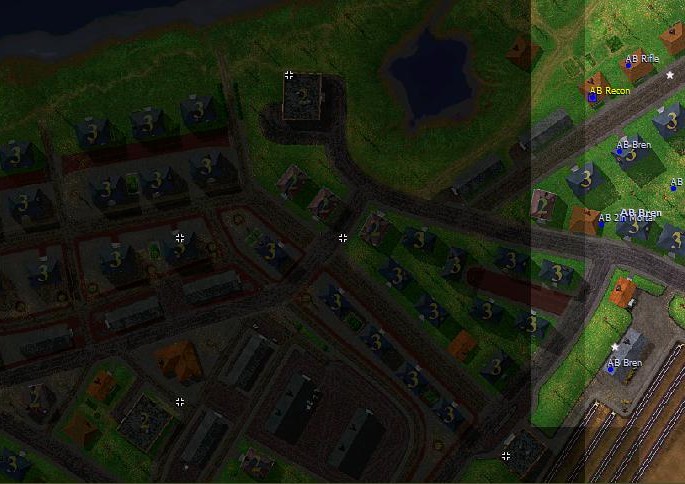
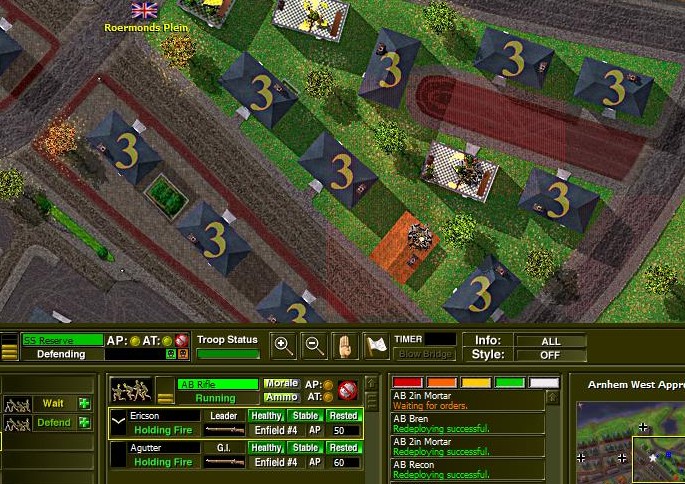
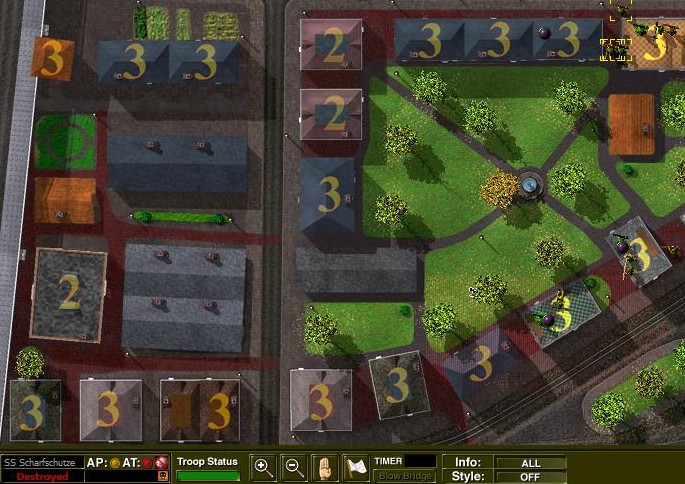
| 1 Setup.jpg | ||
| Description: |
|
|
| Filesize: | 74.94 KB | |
| Viewed: | 13215 Time(s) | |
 |
||
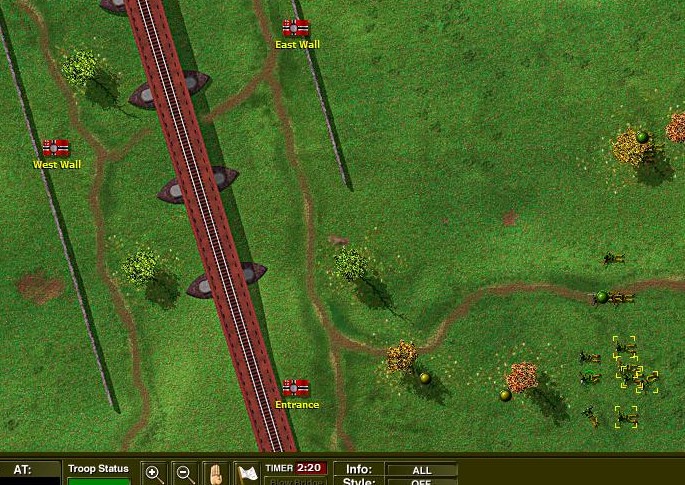
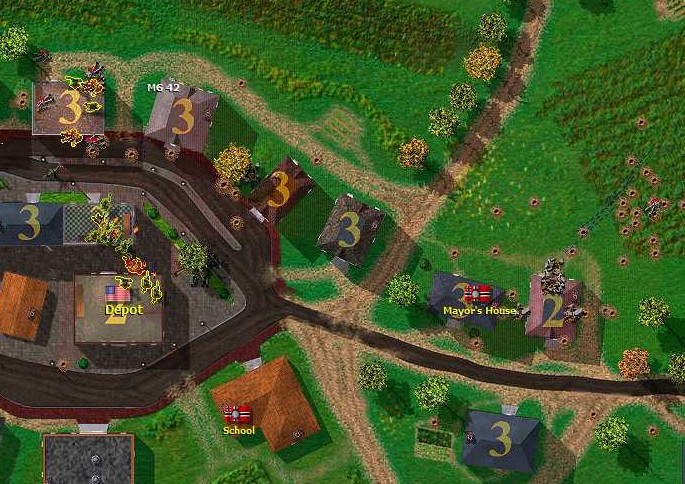
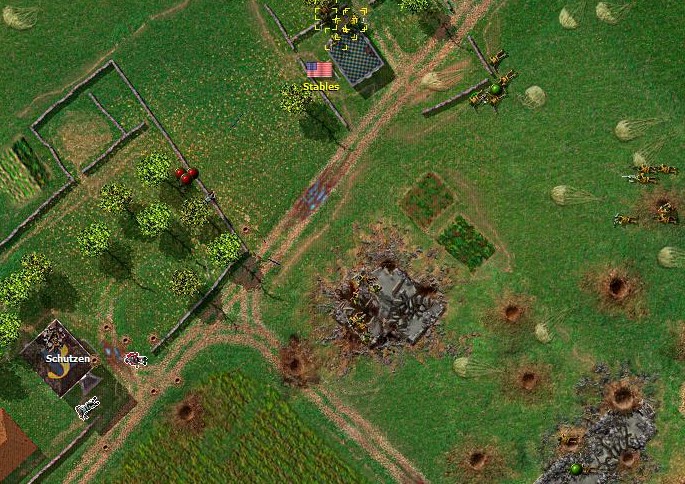
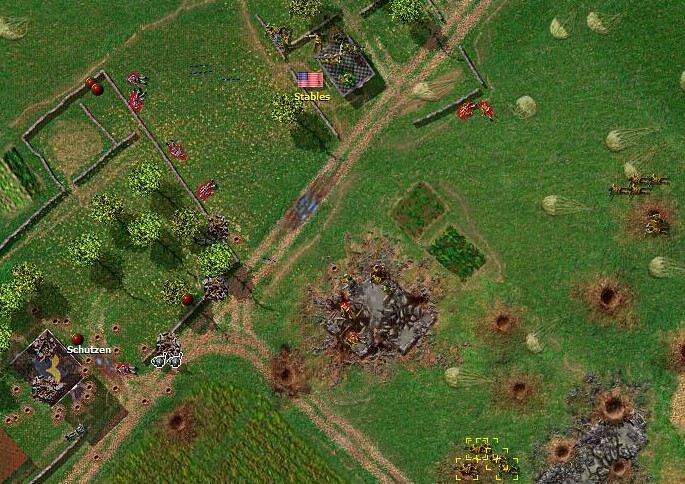
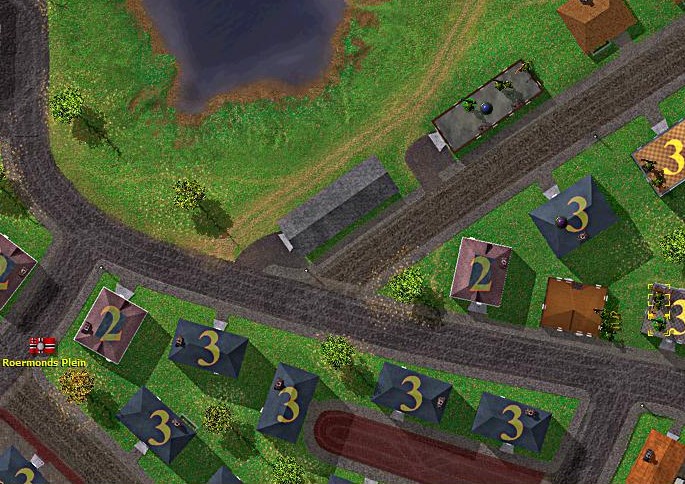
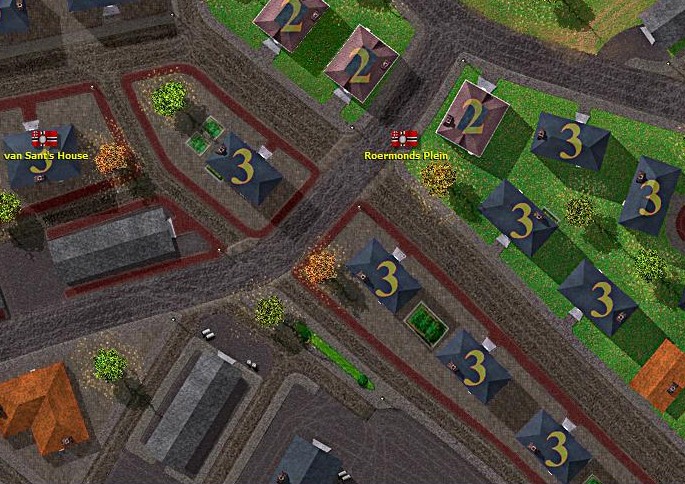
| 2 Start.jpg | ||
| Description: |
|
|
| Filesize: | 158.62 KB | |
| Viewed: | 13212 Time(s) | |
 |
||
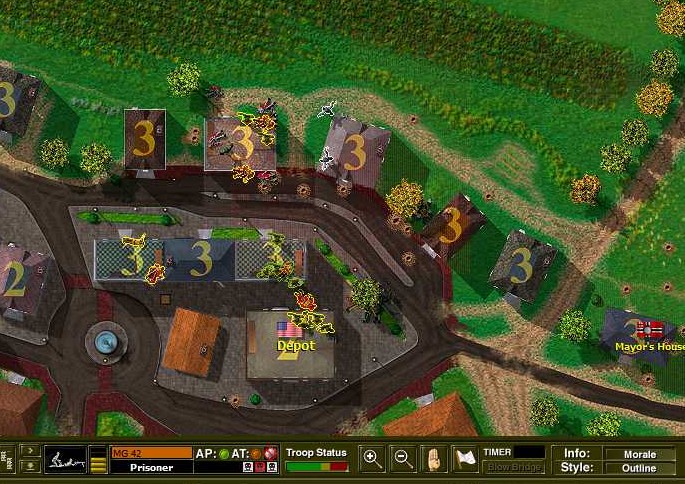
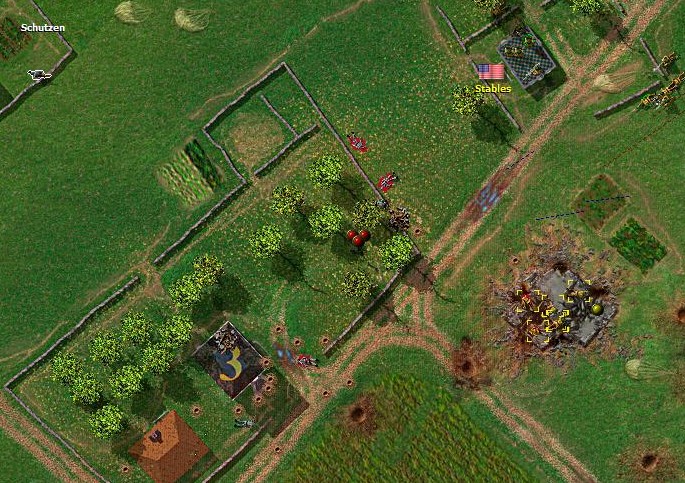
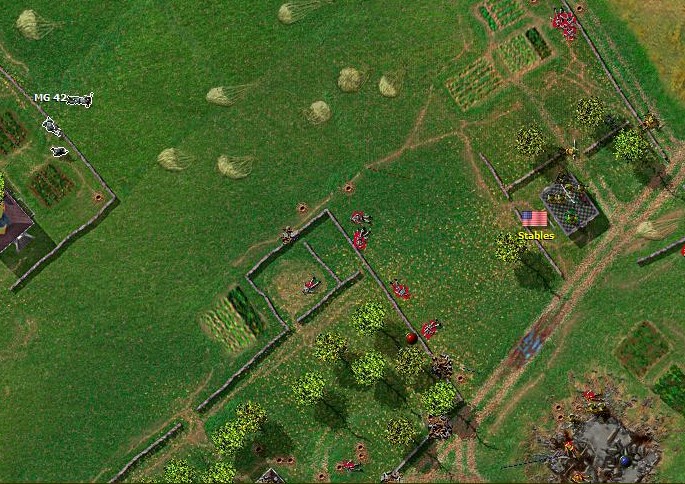
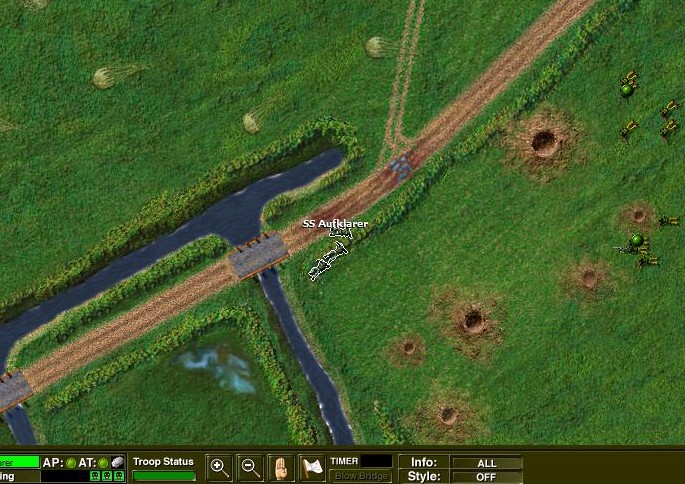
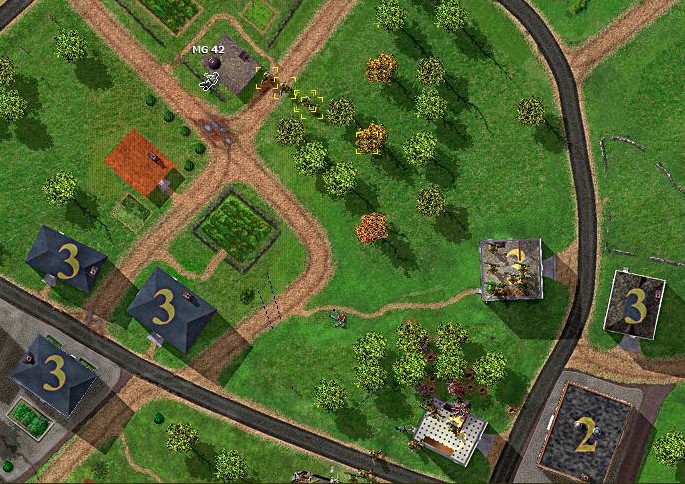
| 3 Contacted.jpg | ||
| Description: |
|
|
| Filesize: | 157.47 KB | |
| Viewed: | 13211 Time(s) | |
 |
||
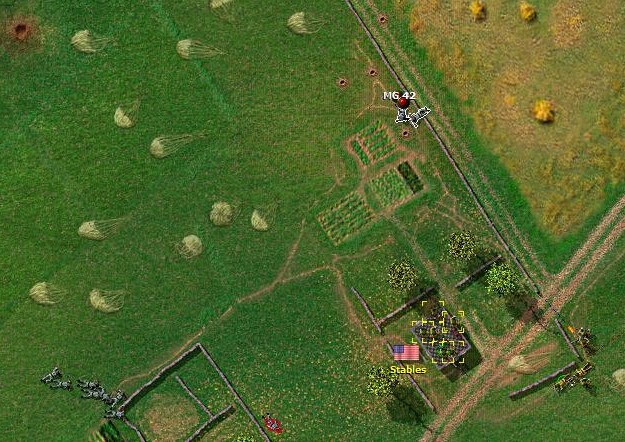
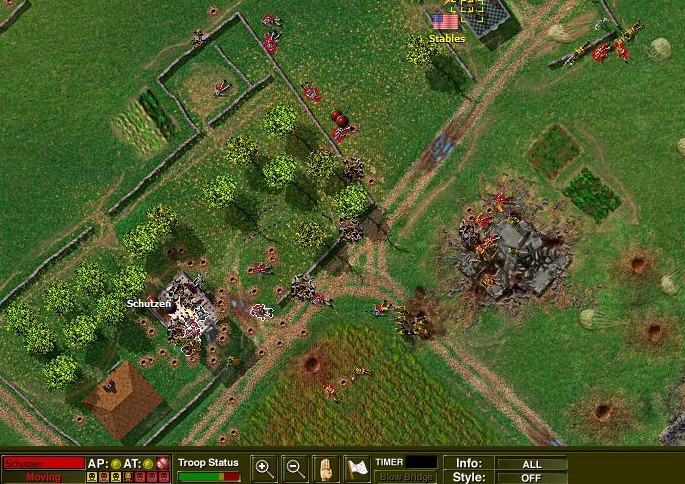
| 4 Diversion.jpg | ||
| Description: |
|
|
| Filesize: | 156.7 KB | |
| Viewed: | 13209 Time(s) | |
 |
||
| 5 KIA & General Advance.jpg | ||
| Description: |
|
|
| Filesize: | 158.84 KB | |
| Viewed: | 13209 Time(s) | |
 |
||
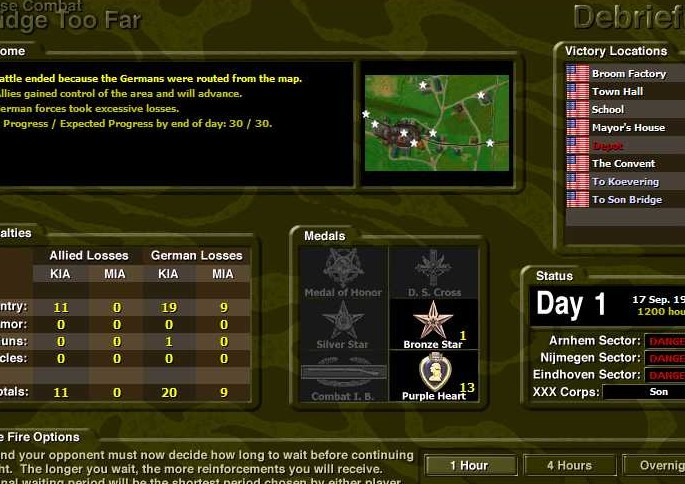
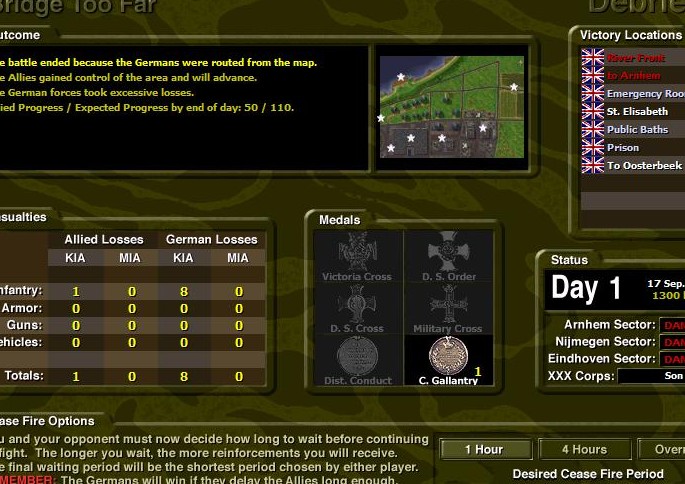
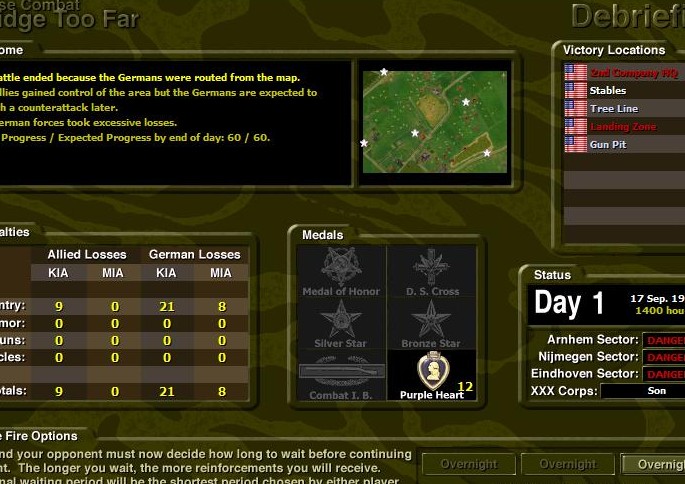
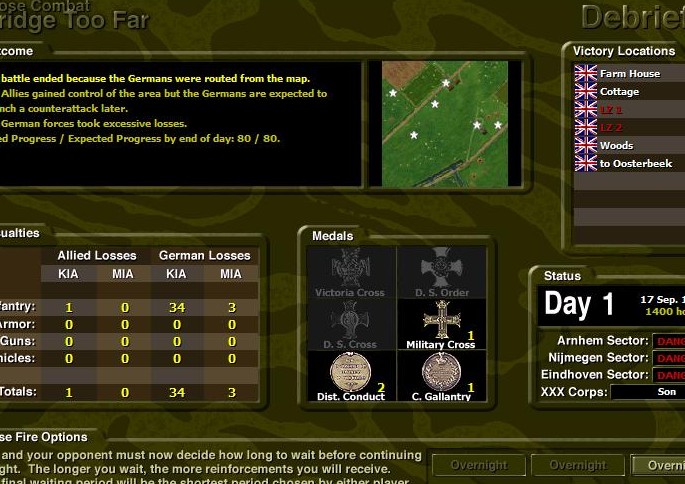
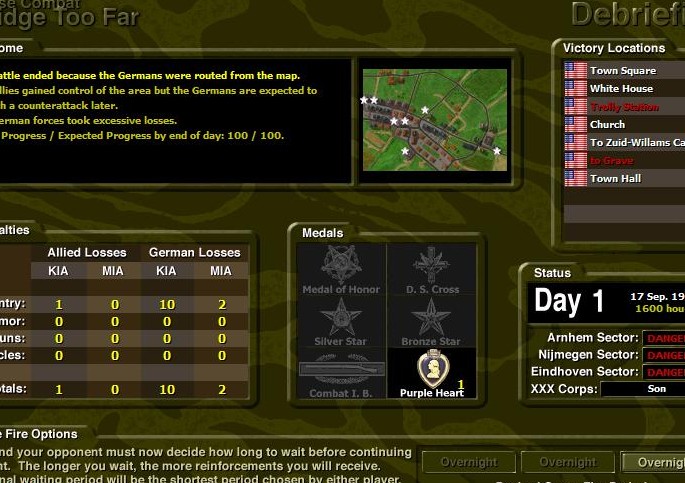
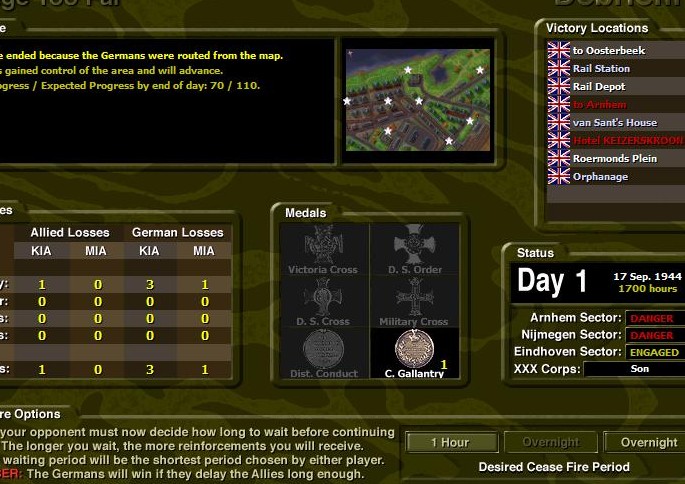
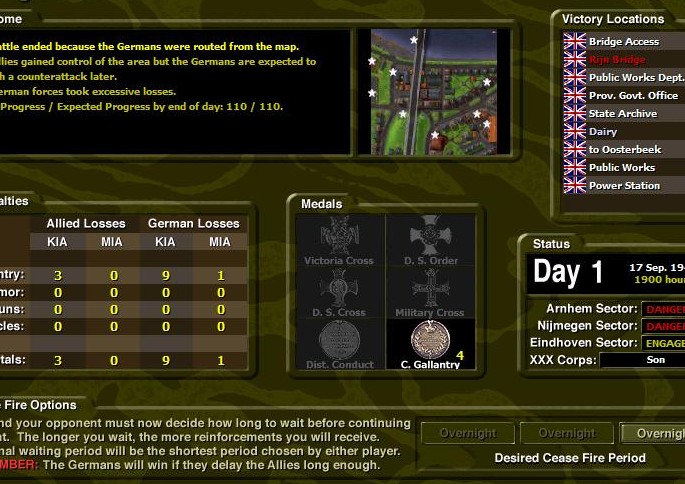
| 6 End of Battle.jpg | ||
| Description: |
|
|
| Filesize: | 114.68 KB | |
| Viewed: | 13202 Time(s) | |
 |
||
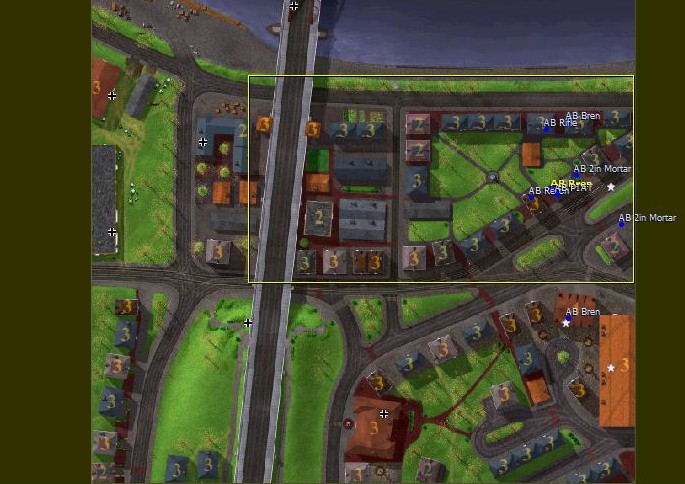
| 3 1st Day.jpg | ||
| Description: |
|
|
| Filesize: | 128.27 KB | |
| Viewed: | 13189 Time(s) | |
 |
||
| OOB2.jpg | ||
| Description: |
|
|
| Filesize: | 127.67 KB | |
| Viewed: | 13187 Time(s) | |
 |
||
| 1 Start.jpg | ||
| Description: |
|
|
| Filesize: | 89.89 KB | |
| Viewed: | 13186 Time(s) | |
 |
||
| 2 Diversion.jpg | ||
| Description: |
|
|
| Filesize: | 129.89 KB | |
| Viewed: | 13185 Time(s) | |
 |
||
| 3 Main Effort.jpg | ||
| Description: |
|
|
| Filesize: | 159.8 KB | |
| Viewed: | 13184 Time(s) | |
 |
||
| 4 Smoke Cover.jpg | ||
| Description: |
|
|
| Filesize: | 137.13 KB | |
| Viewed: | 13183 Time(s) | |
 |
||
| 5 Caught in the open.jpg | ||
| Description: |
|
|
| Filesize: | 154.66 KB | |
| Viewed: | 12314 Time(s) | |
 |
||
| 6 Enemy Disposition & Flank.jpg | ||
| Description: |
|
|
| Filesize: | 131.49 KB | |
| Viewed: | 12315 Time(s) | |
 |
||
| 7 Enemy Flak Gun.jpg | ||
| Description: |
|
|
| Filesize: | 148.91 KB | |
| Viewed: | 12314 Time(s) | |
 |
||
| 8 Assault.jpg | ||
| Description: |
|
|
| Filesize: | 155.58 KB | |
| Viewed: | 12313 Time(s) | |
 |
||
| 9 Enemy Surrender.jpg | ||
| Description: |
|
|
| Filesize: | 150.88 KB | |
| Viewed: | 12311 Time(s) | |
 |
||
| 10 End of Battle.jpg | ||
| Description: |
|
|
| Filesize: | 115.5 KB | |
| Viewed: | 9341 Time(s) | |
 |
||
| OOB2.jpg | ||
| Description: |
|
|
| Filesize: | 138.05 KB | |
| Viewed: | 9323 Time(s) | |
 |
||
| 1 Start.jpg | ||
| Description: |
|
|
| Filesize: | 100.04 KB | |
| Viewed: | 9322 Time(s) | |
 |
||
| 2 Recon Sneaking.jpg | ||
| Description: |
|
|
| Filesize: | 151.23 KB | |
| Viewed: | 9321 Time(s) | |
 |
||
| 3 Contact & Firefight.jpg | ||
| Description: |
|
|
| Filesize: | 156.09 KB | |
| Viewed: | 9320 Time(s) | |
 |
||
| 4 Pour it on.jpg | ||
| Description: |
|
|
| Filesize: | 160.35 KB | |
| Viewed: | 9319 Time(s) | |
 |
||
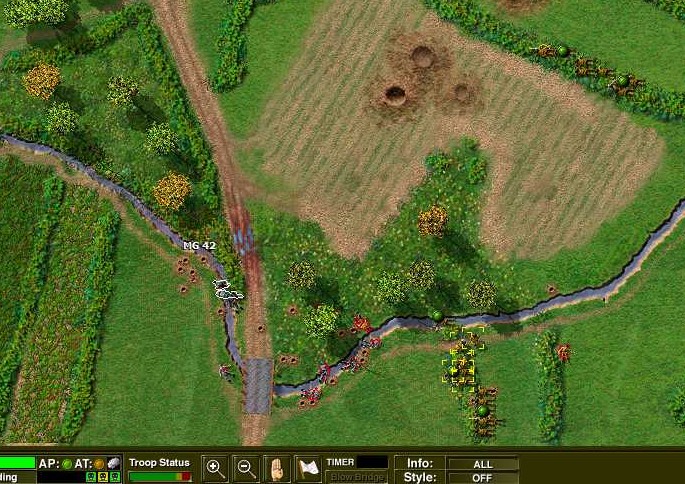
| 5 Nasty MG.jpg | ||
| Description: |
|
|
| Filesize: | 173.46 KB | |
| Viewed: | 9318 Time(s) | |
 |
||
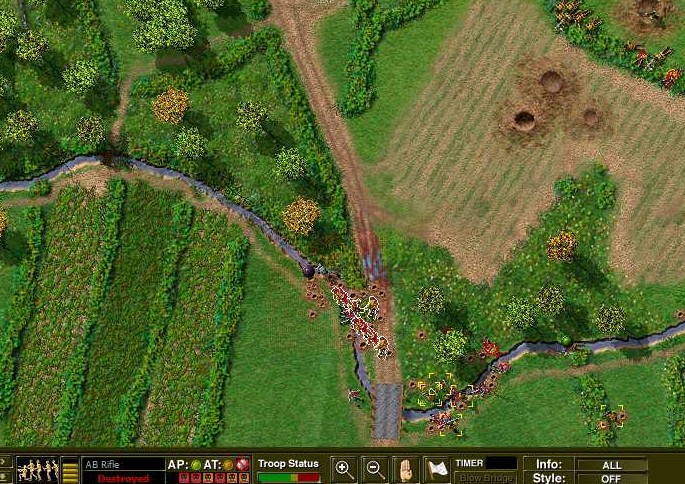
| 7 Suppressed.jpg | ||
| Description: |
|
|
| Filesize: | 169.1 KB | |
| Viewed: | 9317 Time(s) | |
 |
||
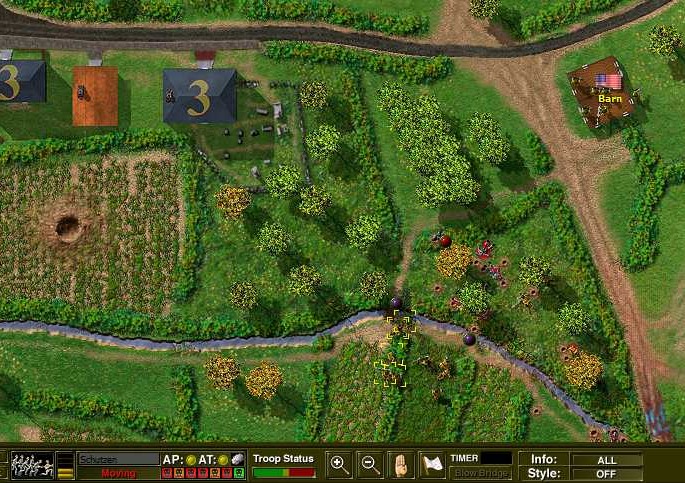
| 9 Rushing the last MG.jpg | ||
| Description: |
|
|
| Filesize: | 167.63 KB | |
| Viewed: | 9313 Time(s) | |
 |
||
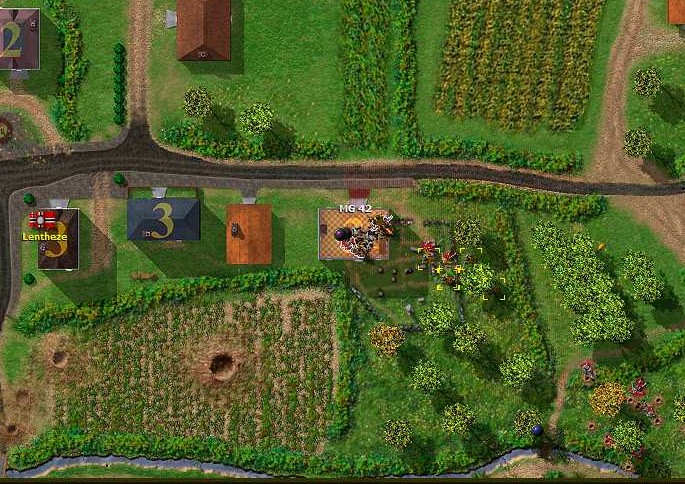
| 10 End of Battle.jpg | ||
| Description: |
|
|
| Filesize: | 112.26 KB | |
| Viewed: | 9342 Time(s) | |
 |
||
| OOB2.jpg | ||
| Description: |
|
|
| Filesize: | 135.24 KB | |
| Viewed: | 9331 Time(s) | |
 |
||
| 1 Start.jpg | ||
| Description: |
|
|
| Filesize: | 169.12 KB | |
| Viewed: | 9330 Time(s) | |
 |
||
| 2 Enemy Surrender.jpg | ||
| Description: |
|
|
| Filesize: | 185.88 KB | |
| Viewed: | 9329 Time(s) | |
 |
||
| 3 End of Battle.jpg | ||
| Description: |
|
|
| Filesize: | 116.12 KB | |
| Viewed: | 9328 Time(s) | |
 |
||
| Ivan_Zaitzev wrote (View Post): |
| Nice AAR, brings back a lot of good memories. |
| 1 Setup.jpg | ||
| Description: |
|
|
| Filesize: | 144.98 KB | |
| Viewed: | 9172 Time(s) | |
 |
||
| 2 Flank Movt.jpg | ||
| Description: |
|
|
| Filesize: | 169.44 KB | |
| Viewed: | 9169 Time(s) | |
 |
||
| 3 Overwatching.jpg | ||
| Description: |
|
|
| Filesize: | 167.56 KB | |
| Viewed: | 9238 Time(s) | |
 |
||
| 5 Rushing.jpg | ||
| Description: |
|
|
| Filesize: | 164.28 KB | |
| Viewed: | 9235 Time(s) | |
 |
||
| 6 Contacted MG.jpg | ||
| Description: |
|
|
| Filesize: | 167.19 KB | |
| Viewed: | 9234 Time(s) | |
 |
||
| 7 End of Battle.jpg | ||
| Description: |
|
|
| Filesize: | 118.57 KB | |
| Viewed: | 9233 Time(s) | |
 |
||
| OOB2.jpg | ||
| Description: |
|
|
| Filesize: | 103.56 KB | |
| Viewed: | 9172 Time(s) | |
 |
||
| 1 Start.jpg | ||
| Description: |
|
|
| Filesize: | 93.86 KB | |
| Viewed: | 9170 Time(s) | |
 |
||
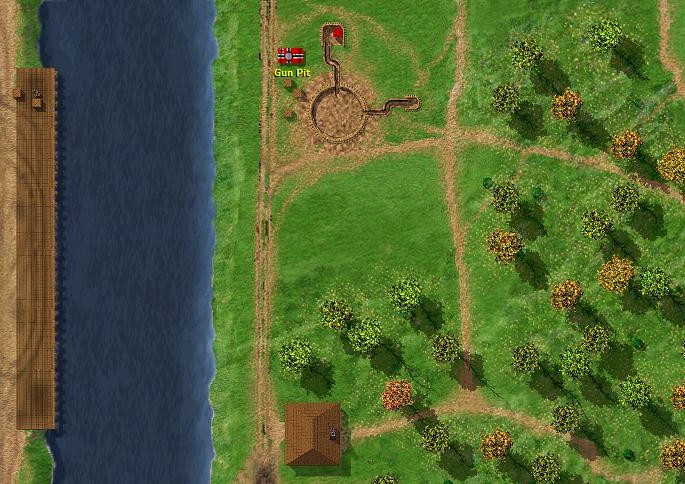
| 2 Gun Pit.jpg | ||
| Description: |
|
|
| Filesize: | 125.87 KB | |
| Viewed: | 9168 Time(s) | |
 |
||
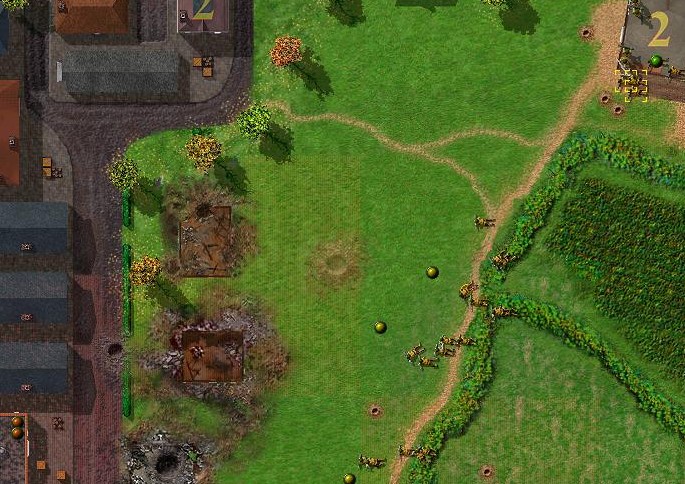
| 4 Approach.jpg | ||
| Description: |
|
|
| Filesize: | 144.49 KB | |
| Viewed: | 9167 Time(s) | |
 |
||
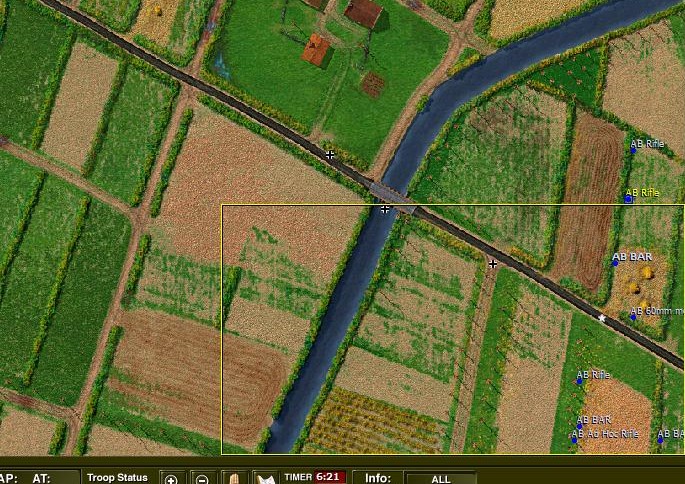
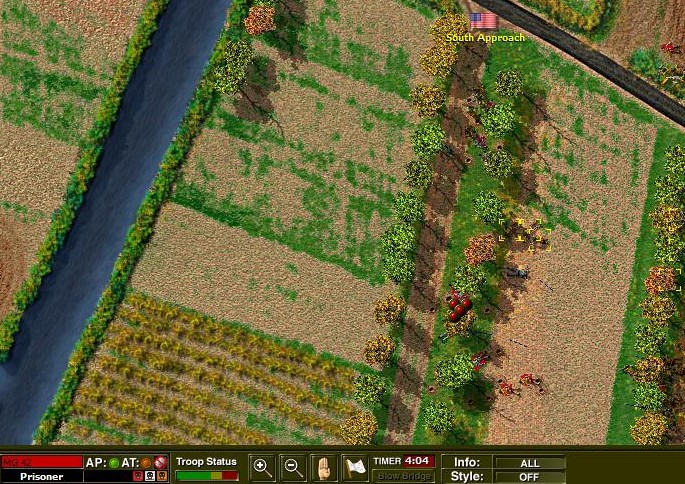
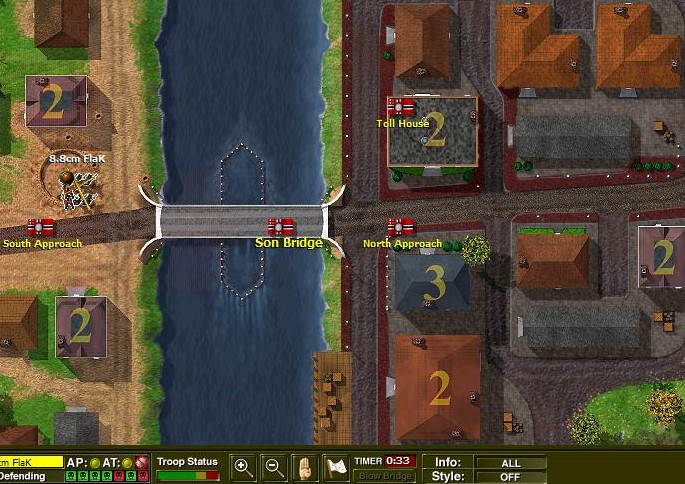
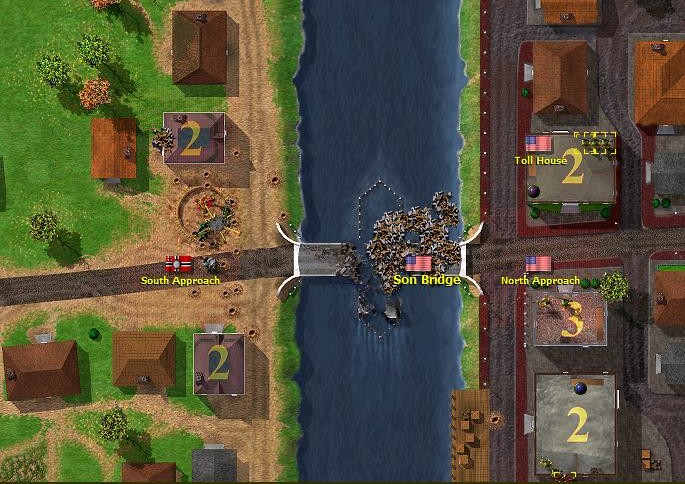
| 3 South Approach.jpg | ||
| Description: |
|
|
| Filesize: | 134.82 KB | |
| Viewed: | 9166 Time(s) | |
 |
||
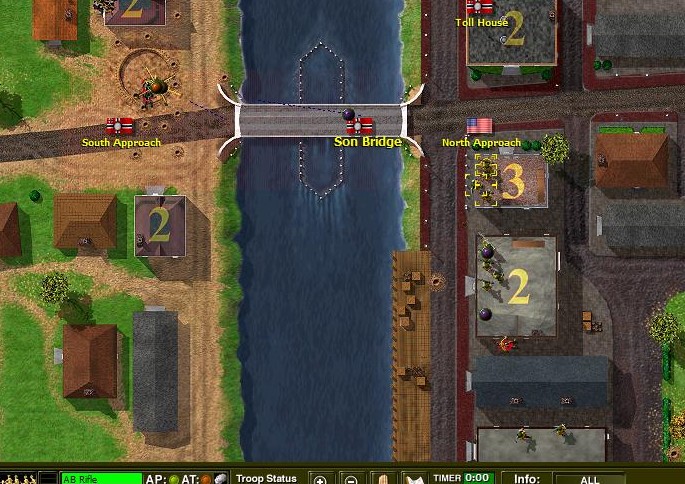
| 5 Rush the Bridge.jpg | ||
| Description: |
|
|
| Filesize: | 138.62 KB | |
| Viewed: | 9099 Time(s) | |
 |
||
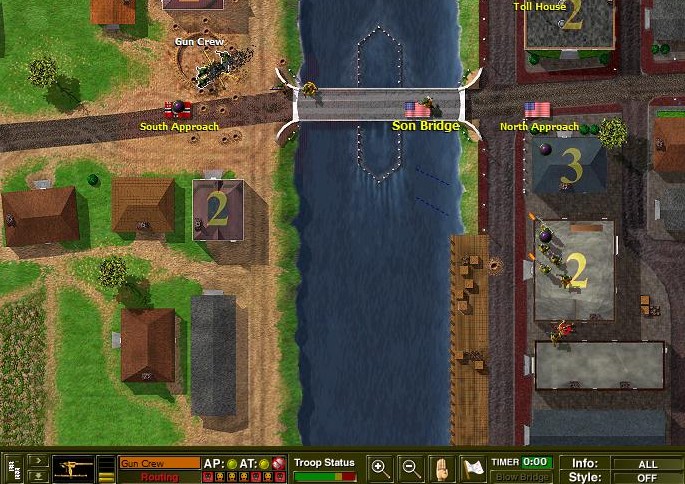
| 6 Bridge Captured.jpg | ||
| Description: |
|
|
| Filesize: | 139.82 KB | |
| Viewed: | 9098 Time(s) | |
 |
||
| 7 Bridge Blown.jpg | ||
| Description: |
|
|
| Filesize: | 128.25 KB | |
| Viewed: | 9096 Time(s) | |
 |
||
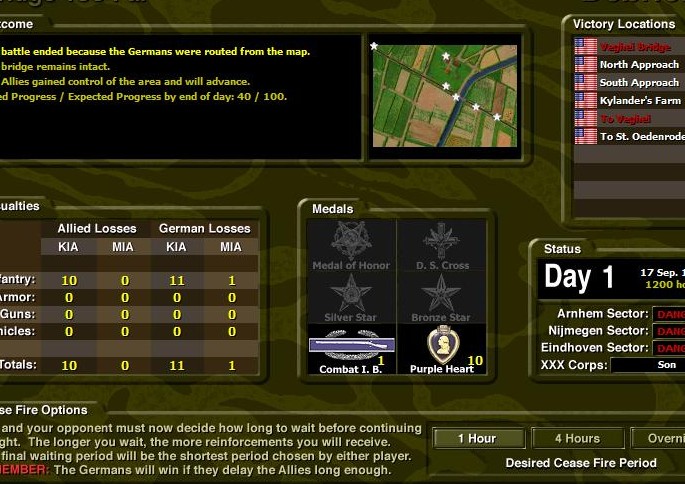
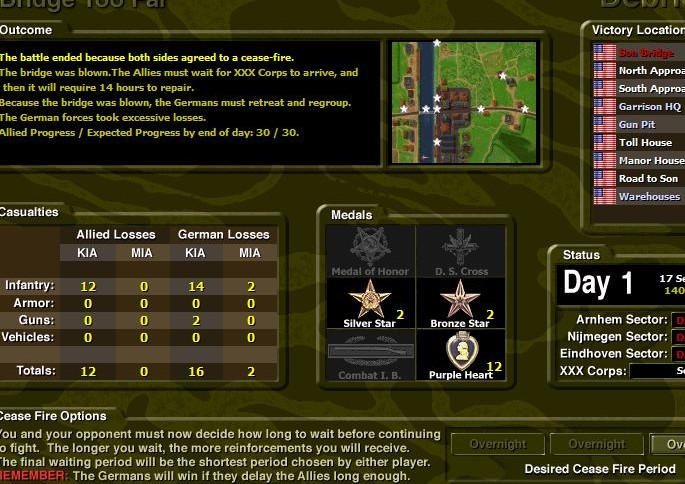
| 9 End of Battle.jpg | ||
| Description: |
|
|
| Filesize: | 122.94 KB | |
| Viewed: | 9093 Time(s) | |
 |
||
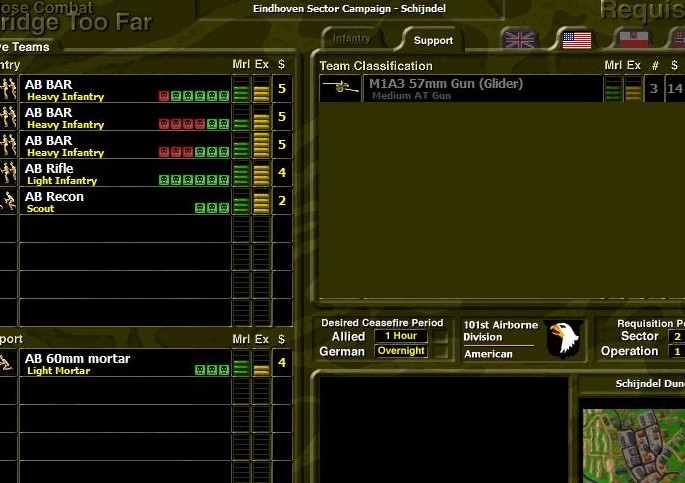
| OOB1.jpg | ||
| Description: |
|
|
| Filesize: | 92.13 KB | |
| Viewed: | 9077 Time(s) | |
 |
||
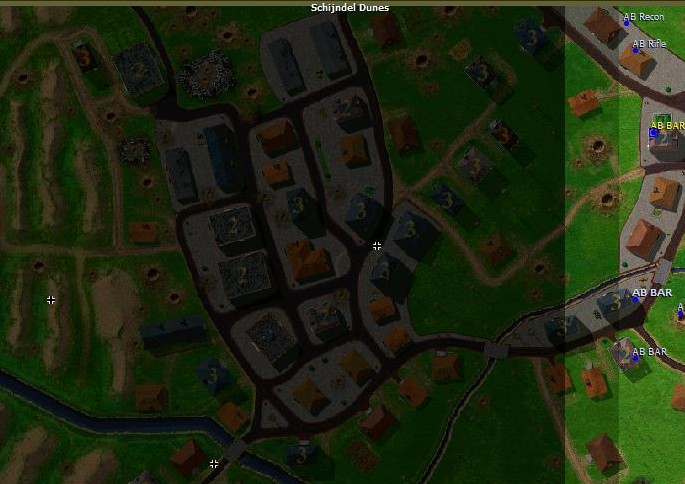
| 1 Start.jpg | ||
| Description: |
|
|
| Filesize: | 90.95 KB | |
| Viewed: | 9076 Time(s) | |
 |
||
| 2 Flanking.jpg | ||
| Description: |
|
|
| Filesize: | 146.1 KB | |
| Viewed: | 9074 Time(s) | |
 |
||
| 3 End of Battle.jpg | ||
| Description: |
|
|
| Filesize: | 113.97 KB | |
| Viewed: | 9072 Time(s) | |
 |
||
| OOB1.jpg | ||
| Description: |
|
|
| Filesize: | 132.66 KB | |
| Viewed: | 9057 Time(s) | |
 |
||
| 1 Start.jpg | ||
| Description: |
|
|
| Filesize: | 98.57 KB | |
| Viewed: | 8366 Time(s) | |
 |
||
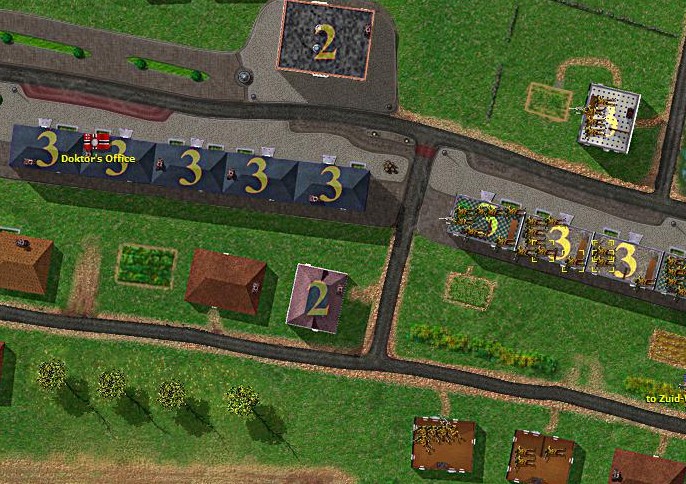
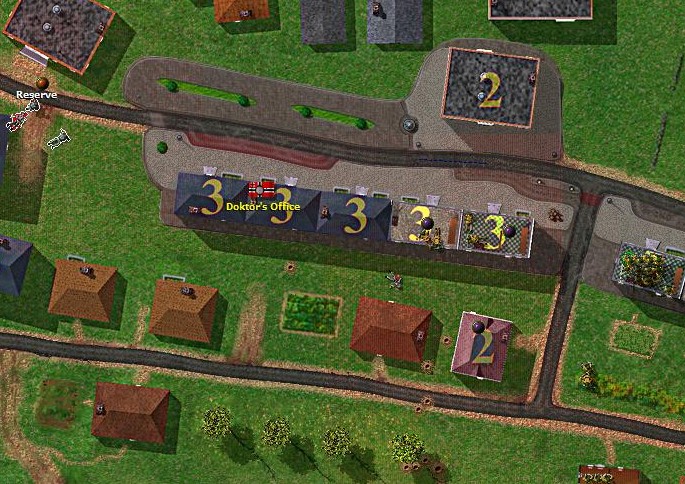
| 2 Doktor's Office.jpg | ||
| Description: |
|
|
| Filesize: | 155.72 KB | |
| Viewed: | 8365 Time(s) | |
 |
||
| 3 Reserve.jpg | ||
| Description: |
|
|
| Filesize: | 157.29 KB | |
| Viewed: | 8364 Time(s) | |
 |
||
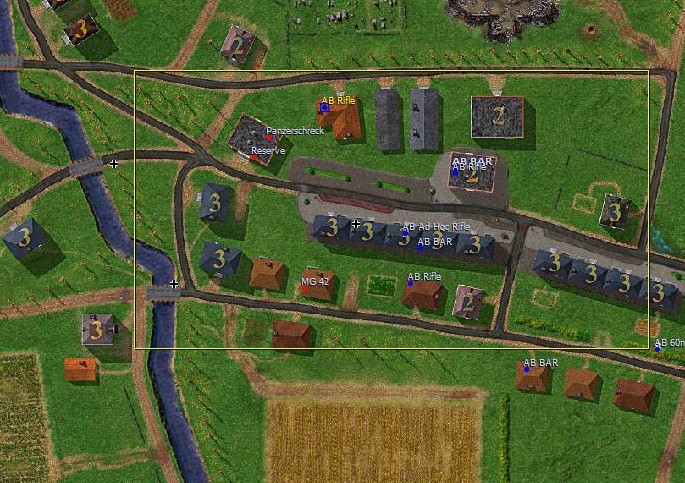
| 4 Enemy Positions.jpg | ||
| Description: |
|
|
| Filesize: | 162.89 KB | |
| Viewed: | 8363 Time(s) | |
 |
||
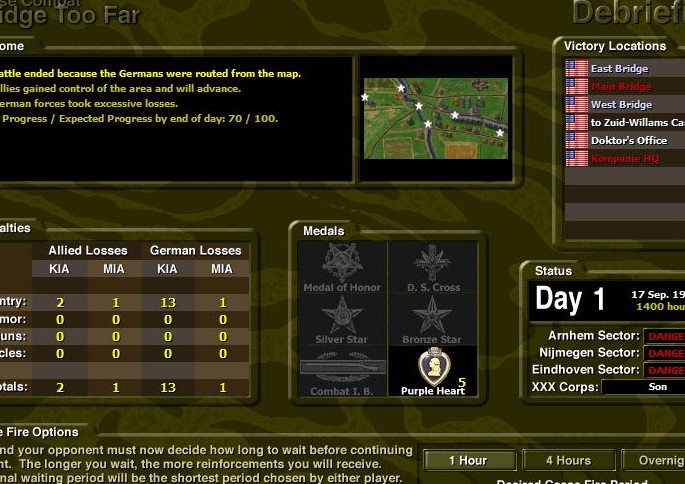
| 5 End of Battle.jpg | ||
| Description: |
|
|
| Filesize: | 110.9 KB | |
| Viewed: | 8362 Time(s) | |
 |
||
| 2 1st Day.jpg | ||
| Description: |
|
|
| Filesize: | 115.79 KB | |
| Viewed: | 8271 Time(s) | |
 |
||
| OOB2.jpg | ||
| Description: |
|
|
| Filesize: | 118.38 KB | |
| Viewed: | 8257 Time(s) | |
 |
||
| 1 Start.jpg | ||
| Description: |
|
|
| Filesize: | 119.03 KB | |
| Viewed: | 8254 Time(s) | |
 |
||
| 2 Villa & Walled Yard.jpg | ||
| Description: |
|
|
| Filesize: | 167.78 KB | |
| Viewed: | 8238 Time(s) | |
 |
||
| 4 Drawing the enemy.jpg | ||
| Description: |
|
|
| Filesize: | 169.22 KB | |
| Viewed: | 8237 Time(s) | |
 |
||
| 6 Enemy Pressing Home.jpg | ||
| Description: |
|
|
| Filesize: | 168.74 KB | |
| Viewed: | 8235 Time(s) | |
 |
||
| 7 Look to your right flank.jpg | ||
| Description: |
|
|
| Filesize: | 129.32 KB | |
| Viewed: | 8234 Time(s) | |
 |
||
| 8 Flank is stabilised.jpg | ||
| Description: |
|
|
| Filesize: | 160.39 KB | |
| Viewed: | 8233 Time(s) | |
 |
||
| 9 Counter Attack.jpg | ||
| Description: |
|
|
| Filesize: | 170.2 KB | |
| Viewed: | 7928 Time(s) | |
 |
||
| 11 MG Strongpoint.jpg | ||
| Description: |
|
|
| Filesize: | 163.3 KB | |
| Viewed: | 7927 Time(s) | |
 |
||
| 12 Clearing the Villa.jpg | ||
| Description: |
|
|
| Filesize: | 173.49 KB | |
| Viewed: | 7926 Time(s) | |
 |
||
| 13 End of Battle.jpg | ||
| Description: |
|
|
| Filesize: | 110.84 KB | |
| Viewed: | 7925 Time(s) | |
 |
||
| OOB1.jpg | ||
| Description: |
|
|
| Filesize: | 114.04 KB | |
| Viewed: | 7916 Time(s) | |
 |
||
| 1 Start.jpg | ||
| Description: |
|
|
| Filesize: | 82.89 KB | |
| Viewed: | 7240 Time(s) | |
 |
||
| 2 Concealed Approach Gully.jpg | ||
| Description: |
|
|
| Filesize: | 140.92 KB | |
| Viewed: | 7224 Time(s) | |
 |
||
| 3 Left Flank.jpg | ||
| Description: |
|
|
| Filesize: | 103.38 KB | |
| Viewed: | 7223 Time(s) | |
 |
||
| 4 Enemy movement.jpg | ||
| Description: |
|
|
| Filesize: | 106.64 KB | |
| Viewed: | 7222 Time(s) | |
 |
||
| 6 Here they come!.jpg | ||
| Description: |
|
|
| Filesize: | 109.74 KB | |
| Viewed: | 7221 Time(s) | |
 |
||
| 7 Right Flank.jpg | ||
| Description: |
|
|
| Filesize: | 140.43 KB | |
| Viewed: | 7220 Time(s) | |
 |
||
| 9 Defending the Woods VL.jpg | ||
| Description: |
|
|
| Filesize: | 142.86 KB | |
| Viewed: | 7219 Time(s) | |
 |
||
| 10 Clearing up.jpg | ||
| Description: |
|
|
| Filesize: | 135.85 KB | |
| Viewed: | 7330 Time(s) | |
 |
||
| 11 End of Battle.jpg | ||
| Description: |
|
|
| Filesize: | 115.45 KB | |
| Viewed: | 7328 Time(s) | |
 |
||
| 1 Start.jpg | ||
| Description: |
|
|
| Filesize: | 95.88 KB | |
| Viewed: | 7326 Time(s) | |
 |
||
| 2 Clearing House.jpg | ||
| Description: |
|
|
| Filesize: | 153.18 KB | |
| Viewed: | 7325 Time(s) | |
 |
||
| 3 End of Battle.jpg | ||
| Description: |
|
|
| Filesize: | 113.96 KB | |
| Viewed: | 7324 Time(s) | |
 |
||
| OOB2.jpg | ||
| Description: |
|
|
| Filesize: | 119.65 KB | |
| Viewed: | 7246 Time(s) | |
 |
||
| 1 Start of Battle.jpg | ||
| Description: |
|
|
| Filesize: | 169.25 KB | |
| Viewed: | 7245 Time(s) | |
 |
||
| 2 Enemy Flanking.jpg | ||
| Description: |
|
|
| Filesize: | 177.45 KB | |
| Viewed: | 7244 Time(s) | |
 |
||
| 3 Enemy Positions.jpg | ||
| Description: |
|
|
| Filesize: | 161.09 KB | |
| Viewed: | 7243 Time(s) | |
 |
||
| 4 Assaulting the MG42.jpg | ||
| Description: |
|
|
| Filesize: | 169.1 KB | |
| Viewed: | 7242 Time(s) | |
 |
||
| 5 End of Battle.jpg | ||
| Description: |
|
|
| Filesize: | 112.42 KB | |
| Viewed: | 7028 Time(s) | |
 |
||
| OOB1.jpg | ||
| Description: |
|
|
| Filesize: | 106.14 KB | |
| Viewed: | 7017 Time(s) | |
 |
||
| 1 Start.jpg | ||
| Description: |
|
|
| Filesize: | 99.78 KB | |
| Viewed: | 7014 Time(s) | |
 |
||
| 2 Approach.jpg | ||
| Description: |
|
|
| Filesize: | 151.52 KB | |
| Viewed: | 7013 Time(s) | |
 |
||
| 3 Enemy Contact.jpg | ||
| Description: |
|
|
| Filesize: | 156.26 KB | |
| Viewed: | 7012 Time(s) | |
 |
||
| 4 VLs of interest.jpg | ||
| Description: |
|
|
| Filesize: | 152.08 KB | |
| Viewed: | 6978 Time(s) | |
 |
||
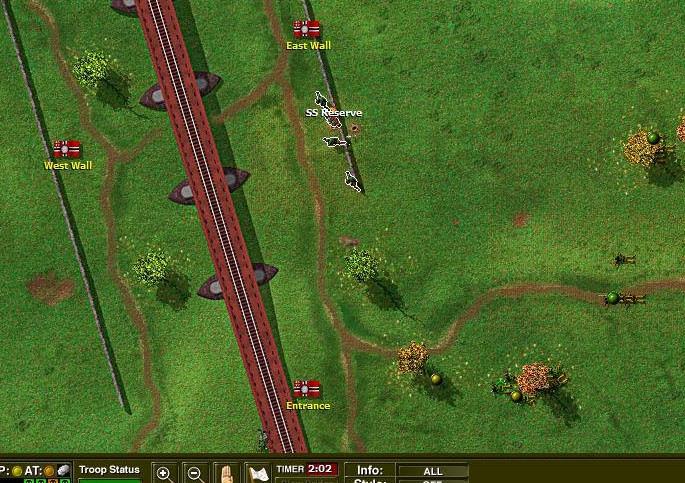
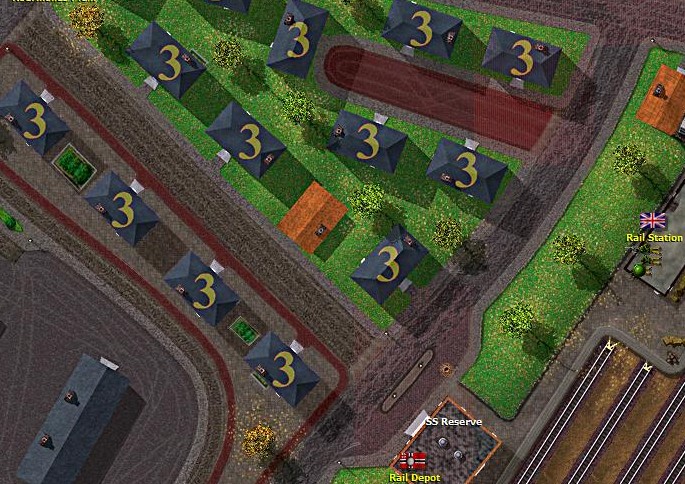
| 6 SS Reserve.jpg | ||
| Description: |
|
|
| Filesize: | 157.81 KB | |
| Viewed: | 6976 Time(s) | |
 |
||
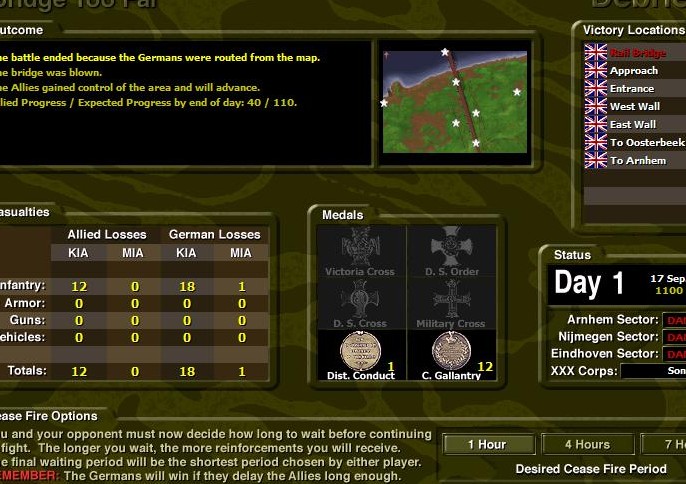
| 7 End of Battle.jpg | ||
| Description: |
|
|
| Filesize: | 116.63 KB | |
| Viewed: | 6975 Time(s) | |
 |
||
| OOB1.jpg | ||
| Description: |
|
|
| Filesize: | 124.22 KB | |
| Viewed: | 6974 Time(s) | |
 |
||
| 1 Start.jpg | ||
| Description: |
|
|
| Filesize: | 106.2 KB | |
| Viewed: | 6972 Time(s) | |
 |
||
| 2 Contact.jpg | ||
| Description: |
|
|
| Filesize: | 130.07 KB | |
| Viewed: | 6910 Time(s) | |
 |
||
| 3 End of Battle.jpg | ||
| Description: |
|
|
| Filesize: | 123.76 KB | |
| Viewed: | 6909 Time(s) | |
 |
||
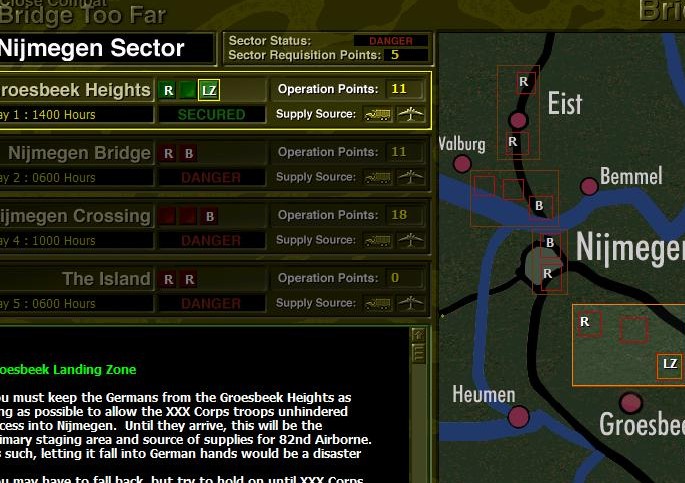
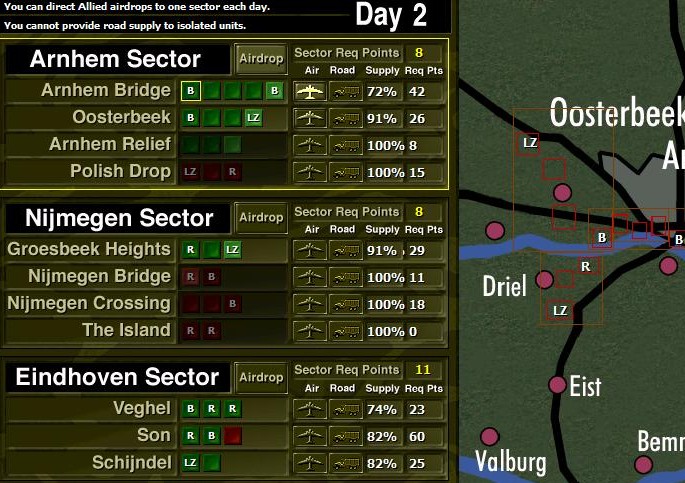
| 4 2nd Day Supply.jpg | ||
| Description: |
|
|
| Filesize: | 130.8 KB | |
| Viewed: | 6908 Time(s) | |
 |
||
| OOB2.jpg | ||
| Description: |
|
|
| Filesize: | 147.37 KB | |
| Viewed: | 6897 Time(s) | |
 |
||
| 1 Start.jpg | ||
| Description: |
|
|
| Filesize: | 124.96 KB | |
| Viewed: | 6896 Time(s) | |
 |
||
| 2 Enemy Armour.jpg | ||
| Description: |
|
|
| Filesize: | 138.47 KB | |
| Viewed: | 6882 Time(s) | |
 |
||
| 3 Enemy Advance.jpg | ||
| Description: |
|
|
| Filesize: | 136.98 KB | |
| Viewed: | 6879 Time(s) | |
 |
||
| 4 Centre pullback.jpg | ||
| Description: |
|
|
| Filesize: | 151.6 KB | |
| Viewed: | 6598 Time(s) | |
 |
||
| 5 Bazooka kill SPG.jpg | ||
| Description: |
|
|
| Filesize: | 156.92 KB | |
| Viewed: | 6596 Time(s) | |
 |
||
| 7 Bazooka Attack!.jpg | ||
| Description: |
|
|
| Filesize: | 148.63 KB | |
| Viewed: | 6595 Time(s) | |
 |
||
| 8 Facing.jpg | |
| Description: |
|