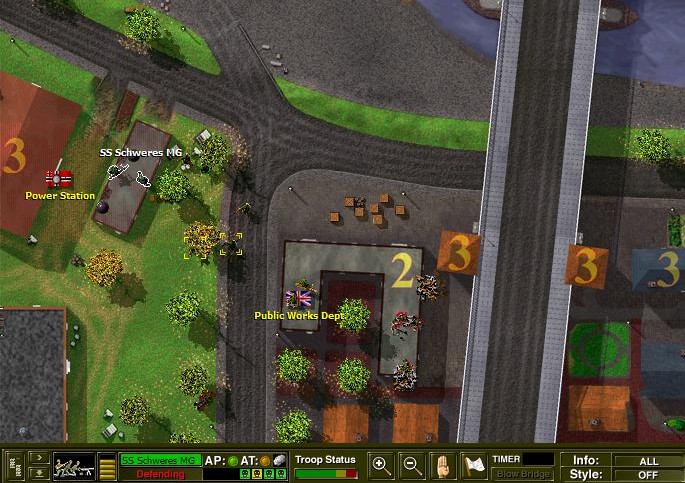
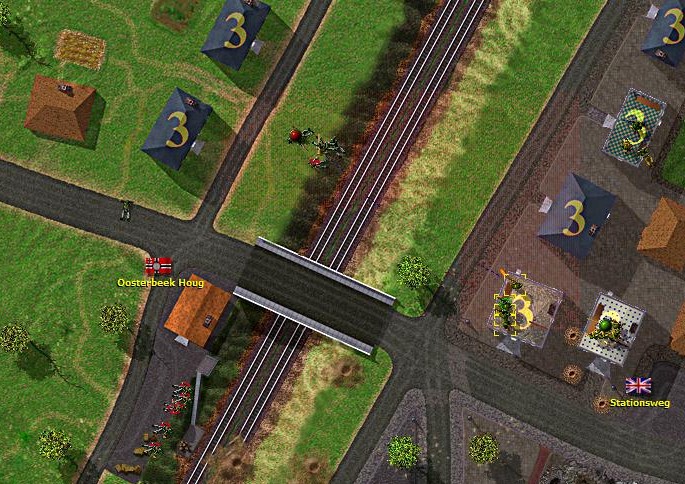
| 6 Attacking the Power Station VL.jpg | ||
| Description: |
|
|
| Filesize: | 125.09 KB | |
| Viewed: | 7863 Time(s) | |
 |
||
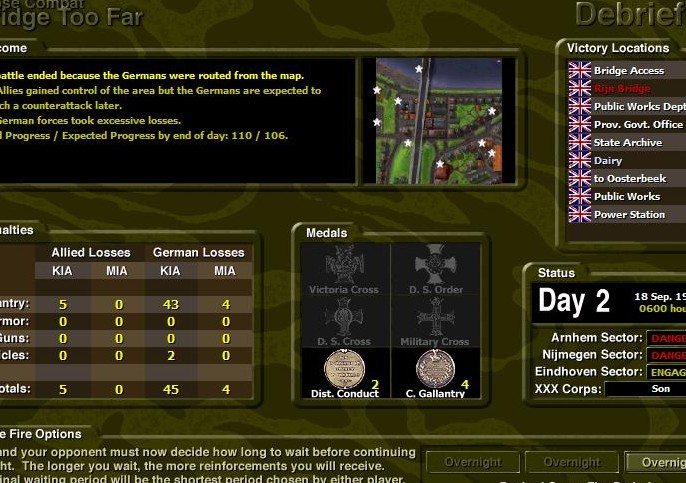
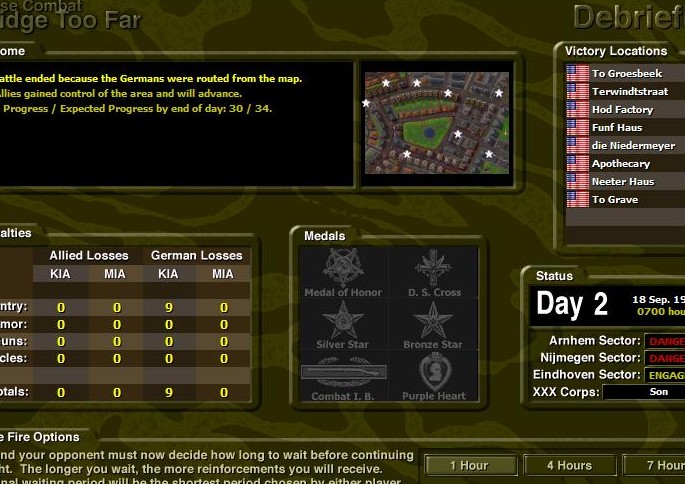
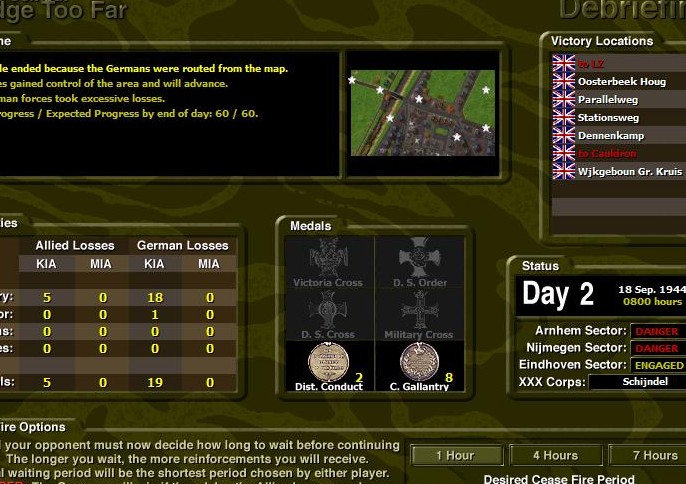
| 7 End of Battle.jpg | ||
| Description: |
|
|
| Filesize: | 115.59 KB | |
| Viewed: | 7862 Time(s) | |
 |
||
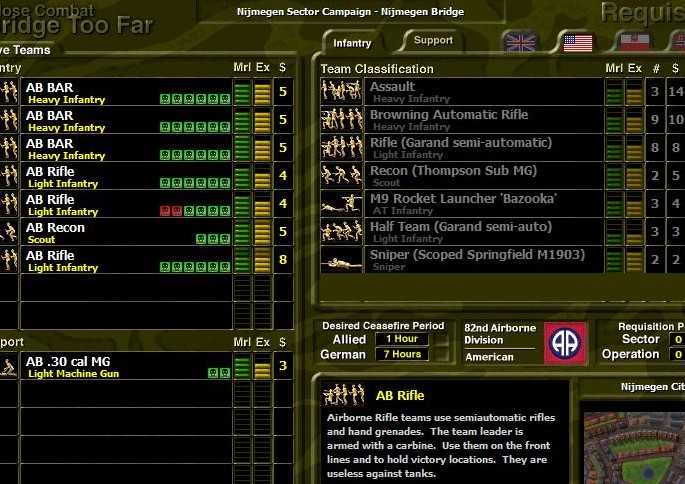
| OOB2.jpg | ||
| Description: |
|
|
| Filesize: | 130.44 KB | |
| Viewed: | 7861 Time(s) | |
 |
||
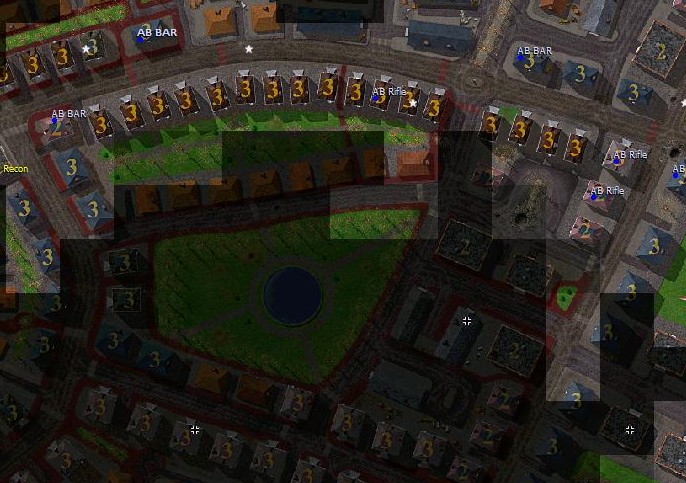
| 1 Start.jpg | ||
| Description: |
|
|
| Filesize: | 118.37 KB | |
| Viewed: | 7860 Time(s) | |
 |
||
| 2 Ambush!.jpg | ||
| Description: |
|
|
| Filesize: | 147.54 KB | |
| Viewed: | 7859 Time(s) | |
 |
||
| 3 End of Battle.jpg | ||
| Description: |
|
|
| Filesize: | 111.8 KB | |
| Viewed: | 8074 Time(s) | |
 |
||
| 1 Start.jpg | ||
| Description: |
|
|
| Filesize: | 91.17 KB | |
| Viewed: | 8075 Time(s) | |
 |
||
| 2 Tanks!.jpg | ||
| Description: |
|
|
| Filesize: | 120.86 KB | |
| Viewed: | 8076 Time(s) | |
 |
||
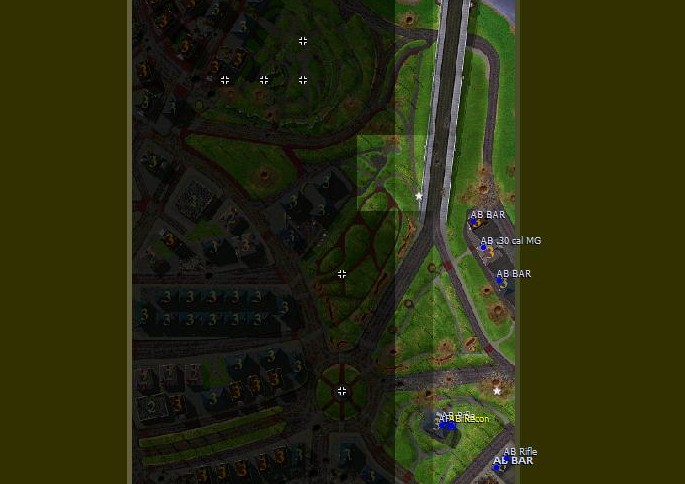
| 1 Start.jpg | ||
| Description: |
|
|
| Filesize: | 136.87 KB | |
| Viewed: | 8077 Time(s) | |
 |
||
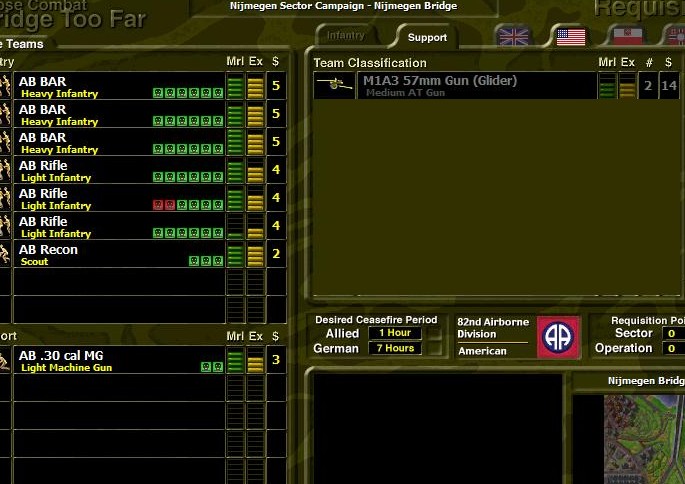
| OOB1.jpg | ||
| Description: |
|
|
| Filesize: | 143.32 KB | |
| Viewed: | 8077 Time(s) | |
 |
||
| 2 Enemy in the open.jpg | ||
| Description: |
|
|
| Filesize: | 163.84 KB | |
| Viewed: | 8068 Time(s) | |
 |
||
| 5 Enemy right advance.jpg | ||
| Description: |
|
|
| Filesize: | 154.41 KB | |
| Viewed: | 7985 Time(s) | |
 |
||
| 6 Enemy left advance.jpg | ||
| Description: |
|
|
| Filesize: | 157.84 KB | |
| Viewed: | 7989 Time(s) | |
 |
||
| 7 2nd Line.jpg | ||
| Description: |
|
|
| Filesize: | 159.69 KB | |
| Viewed: | 7990 Time(s) | |
 |
||
| 8 PIAT in position.jpg | ||
| Description: |
|
|
| Filesize: | 164.97 KB | |
| Viewed: | 7991 Time(s) | |
 |
||
| 9 End of Battle.jpg | ||
| Description: |
|
|
| Filesize: | 113.1 KB | |
| Viewed: | 7990 Time(s) | |
 |
||
| OOB1.jpg | ||
| Description: |
|
|
| Filesize: | 95.82 KB | |
| Viewed: | 7981 Time(s) | |
 |
||
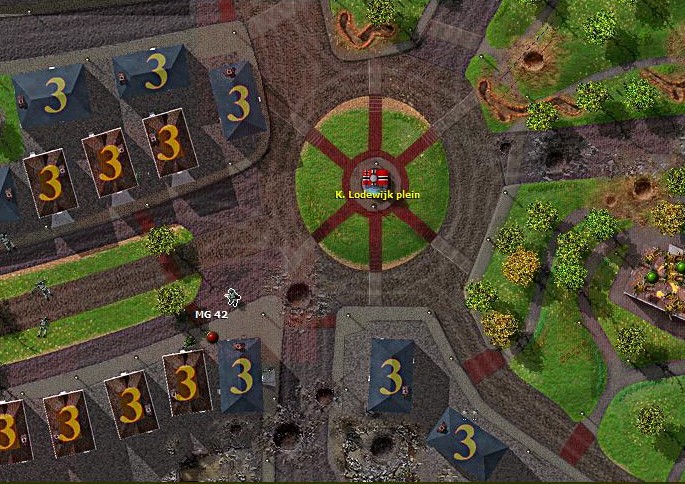
| 1 Start.jpg | ||
| Description: |
|
|
| Filesize: | 72.3 KB | |
| Viewed: | 7981 Time(s) | |
 |
||
| 3 Enemy movement in the open.jpg | ||
| Description: |
|
|
| Filesize: | 163.48 KB | |
| Viewed: | 7990 Time(s) | |
 |
||
| 5 Moving down the left.jpg | ||
| Description: |
|
|
| Filesize: | 167.49 KB | |
| Viewed: | 7991 Time(s) | |
 |
||
| 7 Clearing the Left flank.jpg | ||
| Description: |
|
|
| Filesize: | 168.69 KB | |
| Viewed: | 7990 Time(s) | |
 |
||
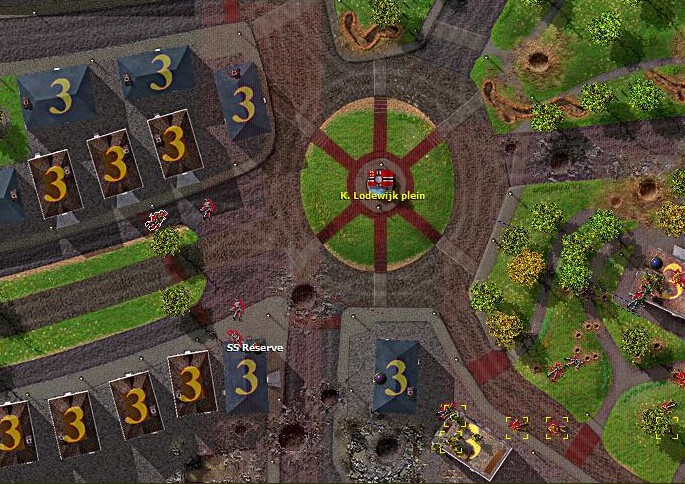
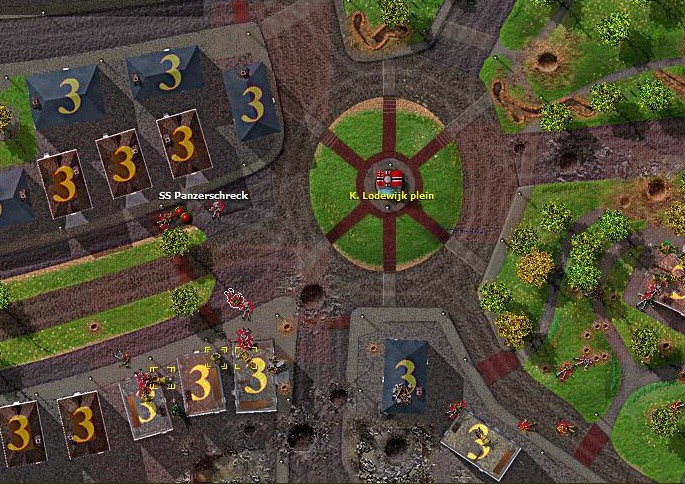
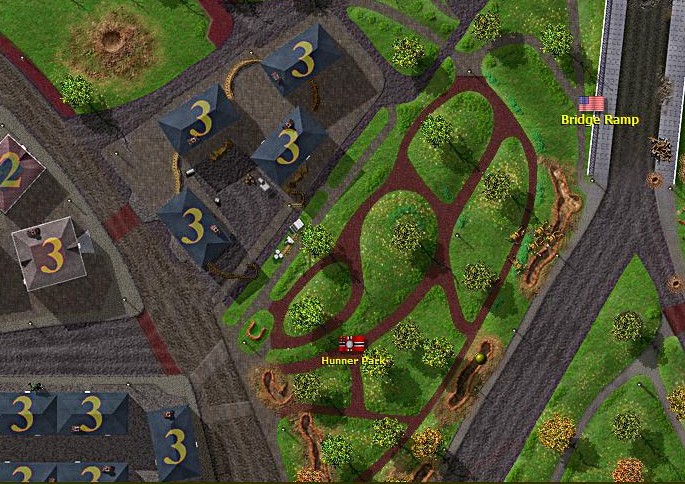
| 8 Clearing the Hunner Park.jpg | ||
| Description: |
|
|
| Filesize: | 156.02 KB | |
| Viewed: | 7989 Time(s) | |
 |
||
output generated using printer-friendly topic mod. All times are GMT