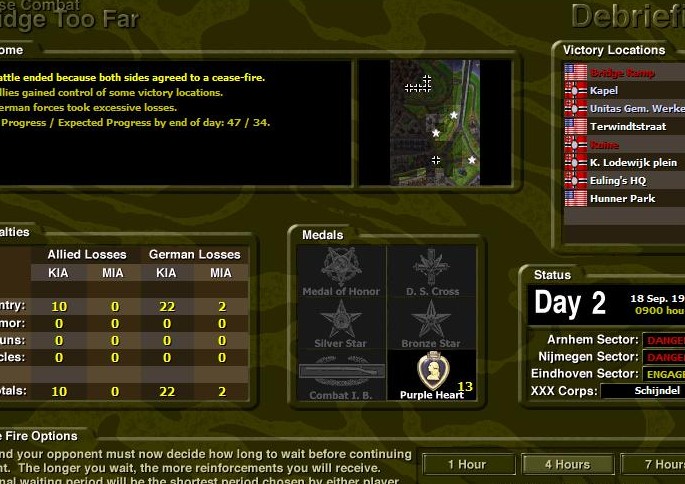
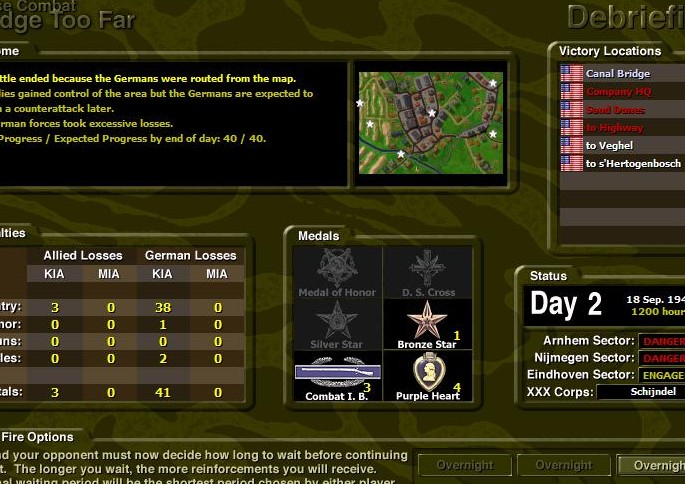
| 9 End of Battle.jpg | ||
| Description: |
|
|
| Filesize: | 111.59 KB | |
| Viewed: | 11579 Time(s) | |
 |
||
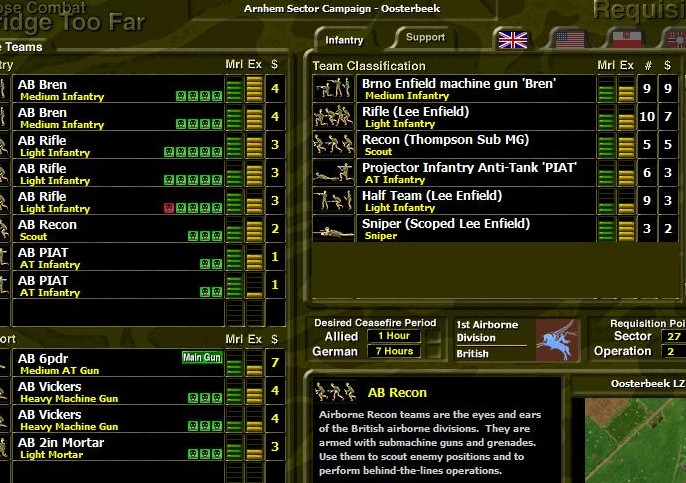
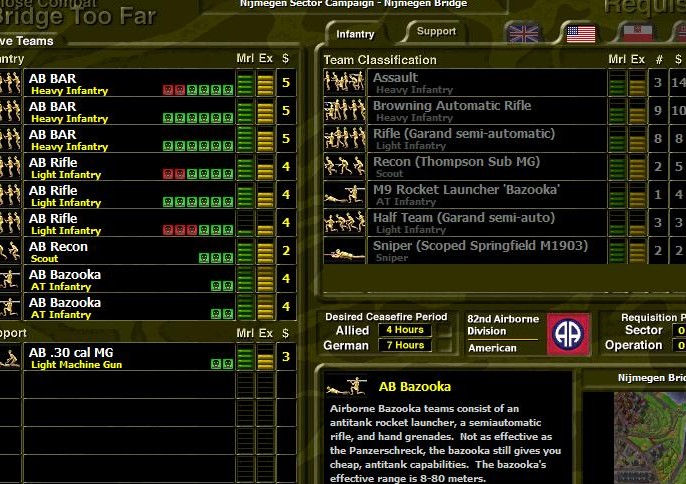
| OOB1.jpg | ||
| Description: |
|
|
| Filesize: | 141.52 KB | |
| Viewed: | 11565 Time(s) | |
 |
||
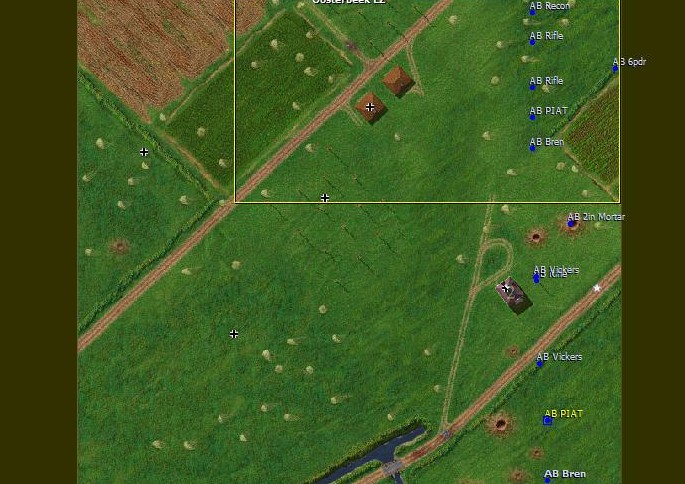
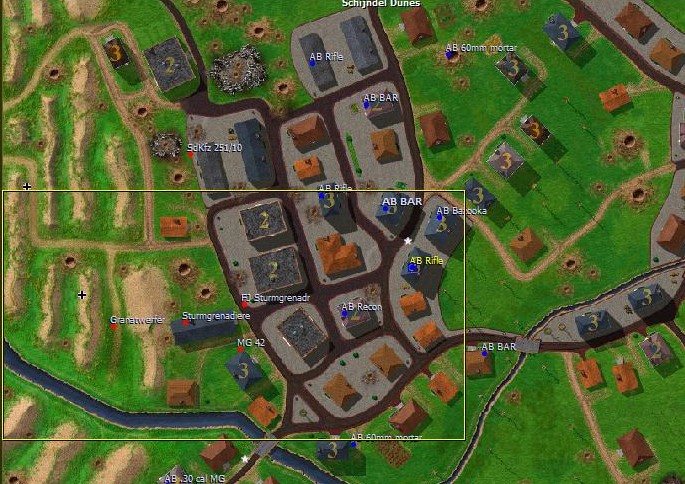
| 1 Start.jpg | ||
| Description: |
|
|
| Filesize: | 110.46 KB | |
| Viewed: | 11565 Time(s) | |
 |
||
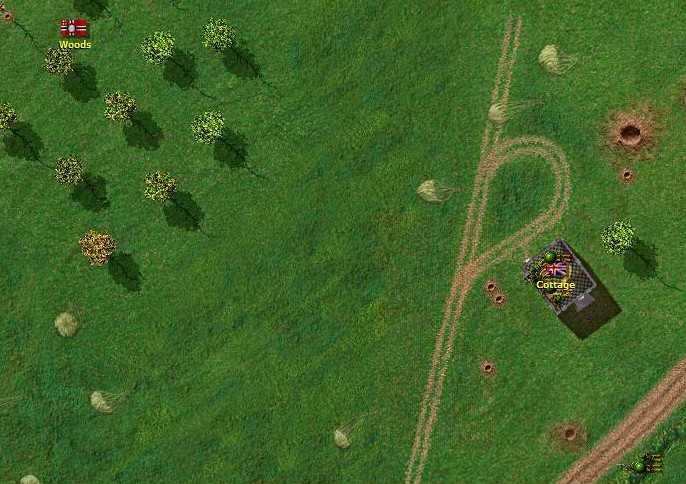
| 2 Capturing Cottage VL.jpg | ||
| Description: |
|
|
| Filesize: | 136.55 KB | |
| Viewed: | 11562 Time(s) | |
 |
||
| 3 Moving to Farm House VL.jpg | ||
| Description: |
|
|
| Filesize: | 142.49 KB | |
| Viewed: | 11562 Time(s) | |
 |
||
| 4 Enemy in the Woods VL.jpg | ||
| Description: |
|
|
| Filesize: | 139.86 KB | |
| Viewed: | 11559 Time(s) | |
 |
||
| 5 Enemy Concentrating in Woods.jpg | ||
| Description: |
|
|
| Filesize: | 141.25 KB | |
| Viewed: | 11559 Time(s) | |
 |
||
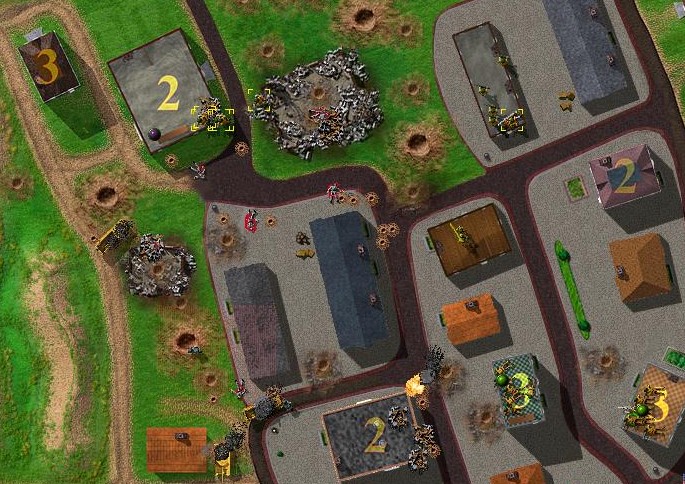
| 7 End of Battle.jpg | ||
| Description: |
|
|
| Filesize: | 114.13 KB | |
| Viewed: | 11560 Time(s) | |
 |
||
| 3 2nd Day.jpg | ||
| Description: |
|
|
| Filesize: | 98.06 KB | |
| Viewed: | 11543 Time(s) | |
 |
||
| OOB 1.jpg | ||
| Description: |
|
|
| Filesize: | 141.88 KB | |
| Viewed: | 11537 Time(s) | |
 |
||
| 1 Start.jpg | ||
| Description: |
|
|
| Filesize: | 130.07 KB | |
| Viewed: | 11537 Time(s) | |
 |
||
| 2 Enemy HT.jpg | ||
| Description: |
|
|
| Filesize: | 155.02 KB | |
| Viewed: | 11524 Time(s) | |
 |
||
| 3 Enemy attack breaksdown.jpg | ||
| Description: |
|
|
| Filesize: | 149.16 KB | |
| Viewed: | 11524 Time(s) | |
 |
||
| 4 Counter attack.jpg | ||
| Description: |
|
|
| Filesize: | 153.39 KB | |
| Viewed: | 11522 Time(s) | |
 |
||
| 5 End of Battle.jpg | ||
| Description: |
|
|
| Filesize: | 115.33 KB | |
| Viewed: | 11522 Time(s) | |
 |
||
| OOB2.jpg | ||
| Description: |
|
|
| Filesize: | 136.79 KB | |
| Viewed: | 11495 Time(s) | |
 |
||
| 1 Start.jpg | ||
| Description: |
|
|
| Filesize: | 83.12 KB | |
| Viewed: | 11495 Time(s) | |
 |
||
| 2 Enemy Infiltration.jpg | ||
| Description: |
|
|
| Filesize: | 163.33 KB | |
| Viewed: | 11494 Time(s) | |
 |
||
| 3 Enemy in Hunner Park.jpg | ||
| Description: |
|
|
| Filesize: | 157.11 KB | |
| Viewed: | 11494 Time(s) | |
 |
||
| 4 Enemy positions.jpg | ||
| Description: |
|
|
| Filesize: | 135.63 KB | |
| Viewed: | 11505 Time(s) | |
 |
||
| 5 Enemy Flamethrower.jpg | ||
| Description: |
|
|
| Filesize: | 138.97 KB | |
| Viewed: | 11497 Time(s) | |
 |
||
| 6 Fighting across the street.jpg | ||
| Description: |
|
|
| Filesize: | 165.25 KB | |
| Viewed: | 11871 Time(s) | |
 |
||
| 7 Assaulting enemy positions.jpg | ||
| Description: |
|
|
| Filesize: | 158.48 KB | |
| Viewed: | 11871 Time(s) | |
 |
||
| 8 Converging on Hunner.jpg | ||
| Description: |
|
|
| Filesize: | 89.73 KB | |
| Viewed: | 11869 Time(s) | |
 |
||
| 9 End of Battle.jpg | ||
| Description: |
|
|
| Filesize: | 114.8 KB | |
| Viewed: | 11869 Time(s) | |
 |
||
| 1 Start.jpg | ||
| Description: |
|
|
| Filesize: | 122.41 KB | |
| Viewed: | 11862 Time(s) | |
 |
||
| 2 MG Fight.jpg | ||
| Description: |
|
|
| Filesize: | 149.49 KB | |
| Viewed: | 11857 Time(s) | |
 |
||
| 3 Enemy closing in.jpg | ||
| Description: |
|
|
| Filesize: | 147.73 KB | |
| Viewed: | 11857 Time(s) | |
 |
||
| 4 Schutzen outflanking Vickers.jpg | ||
| Description: |
|
|
| Filesize: | 147.68 KB | |
| Viewed: | 11852 Time(s) | |
 |
||
| 5 AC approaching.jpg | ||
| Description: |
|
|
| Filesize: | 150.17 KB | |
| Viewed: | 11852 Time(s) | |
 |
||
output generated using printer-friendly topic mod. All times are GMT