I am the site admin and hope that every CCS member with Cross of Iron will please support this new project. How does it work? Members meet at Gameranger and take turns hosting each time they play. The host presents a custom battle made in the scenario editor to the Guest Player. The Guest chooses Side. Any Mod or Custom Map can work, its up to the players to work out acceptable terms for a match. 1 Day Battles work well but Ops are great. Try to play at least a couple matches a week.
Thanks, Your support is appreciated !
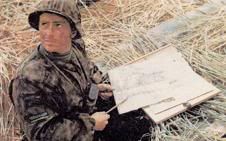
Close Combat's most infamous SOB
Last edited by US_Brake on Fri Feb 24, 2012 6:14 pm; edited 1 time in total
Posted: Wed Jun 29, 2011 9:37 pm Post subject: Re: Join the Cross of Iron Leaderboard
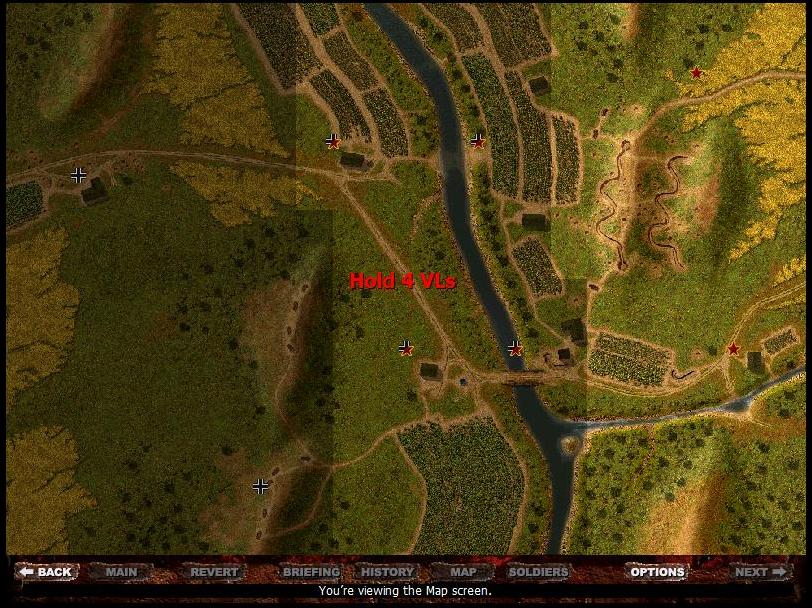
Sample Brief for League Match
Scenario by Brake
MAP: Lvov1
DATE: Spring 1945
POINTS: 1150
TYPE: 1 Day Meeting Engagement
VL's: 8
BARRAGE: Yes Neutral Zone
REALISM RATING: 100%
HISTORICAL RARITY: On
WEATHER: Clear
RANK: Major - Commands 15 Units
AMMO: Full Ammo
TIME: Battle ends when time expires
WIN: Computer decides winner
Playing in the Cross of Iron League requires not only skill as a player but also skill as a battle designer. When League members create new and unique battles or operations it makes the Leaderboard experience a fun challenge. Check out the official manual.
SCENARIO EDITOR MANUAL by Michael Eckenfels
Along with its realistic combat model and real-time action, you can use Close Combat – Cross of Iron to create your own battlefield scenarios. You can customize the data composing your scenarios and adjust the mix and the numbers of troops on both the Russian and German sides.
The Battlemaker
For example, you can design a challenging battle in which one side has a high number of lightly armed, inexperienced infantry units, and the other has infantry units that are small in number but heavily armed and more experienced. You can define one single victory location to be defended by a single large force, or you can define many small victory locations, requiring that you spread out your forces to defend them. By adjusting these different elements of warfare, you can create a wide range of scenarios for testing your skills as a commander.
Starting the Scenario Editor
Start the scenario editor, on the Main screen, click Create A Scenario. The Scenario Edit screen appears.
After you start the scenario editor, the process of building any type of custom game is basically the same regardless of the game type:
• Select the type of game you want to build.
• Select the battle maps.
• Adjust the game settings.
• Edit the maps.
• Select the forces.
• Save the game, go to the Command screen, and play.
Choosing a Game
The first step in creating a custom game is to decide what kind of game you want to serve as a starting point for your custom game. In the Scenario Types list box, click the one of the following options:
• Historical Battle - To edit one of the battles that is provided with the game.
• Historical Operation - To edit one of the operations that is provided with the game.
• Custom Scenario - To edit a custom game that you built previously.
• New Scenario -To build a custom game from scratch.
If you chose New Scenario, the Map Selection screen appears immediately. If you selected any of the first three choices, select the specific battle, operation, or scenario you want to start with, and then click Next to bring up the Map Selection screen.
Choosing Maps
The next step in creating a custom game is choosing the maps you want to include in your scenario. If you chose a historical battle or operation in the previous step, the Map Selection screen displays the default maps for the battle or operation in the lower portion of the screen.
The Scenario Maps box includes all of the battle maps included in Close Combat III. You can scroll through all the available maps and choose the map or maps you want. You can either add maps to the existing maps in the Scenario Map boxes, or replace existing maps with new maps:
To add a map between existing maps, click the map you want to add, drag it to the later of the two existing maps, and then release the mouse button. For example, if you want to add a map to the Kharkov Operation, you can drag a new map to the Scenario Map 2 box, which inserts the new map between the Kharkov 1 and 2 maps.
To add a map to the next available Scenario Map box, either drag it to the Scenario Map box or double-click it.
To delete a map, double-click the map you want to delete. The map moves from the Scenario Map box to the available maps.
To delete a map and replace it with a new one, double-click the map you want to delete, and then drag the map you want to add to the vacant box.
After you are done choosing your maps, click Next to bring up the Scenario Info screen.
Adjusting Game Settings
The next step in creating a custom game is adjusting the game settings using the Scenario Info screen. In this step, you’ll determine the historical timeframe for your game, the number of days in your game, and the weather conditions. You also set the highest rank of the German and Russian commanders, requisition points, and ammunition supplies; as an option, you can create briefing text for both sides.
Choosing a Season and Year
You use the Seasons list box to pick a season and year for your scenario. Your choice affects the units that are included in the force pool. For example, if you pick summer 1942 as the season and year, German Tiger and Russian Josef Stalin III tanks won’t be included in the force pool— neither tank was being produced in 1942.
Choosing Game Length
The next step in creating a custom game is setting the number of days your battle or operation will last. You can have the number of days match the number of maps (up to five maps) or have more days (up to fifteen days) than maps. Use the Days list box to select the number of days you want.
Choosing the Weather
In the Weather list box, click either Clear or Frigid.
Creating Optional Briefing Text
The next step in creating a custom game is optional; you can type German and Russian briefing text that appears when you start the game. The briefing length is limited to the size of the text box in the Briefing dialog box.
Click the Briefing Text button. The Briefing dialog box appears with the cursor in the German The Battlemaker
Scenario Briefing box.
Type the German briefing and then press TAB.
Type the Russian briefing in the Russian Scenario Briefing box and then click OK.
Choosing Historical Unit Allocation
Determine whether you want to allocate units based on their historical rarity. For example, if you base your custom game on the Korsun operation and restrict yourself to historical rarity, German Tiger tanks will not often appear in the force pool. To use historical unit allocation, click the Restrict Players to Historical Rarity of Units button.
Setting Requisition Points
If you are building a custom operation, you can set the number of requisition points each side receives on each day of the game. The higher you set the points, the more high-value teams you can add to your active roster.
You set the points for the first day of an operation using the Map Info screen. In the Map Info screen, click the Map Data button. The Scenario Information dialog box appears.
In the dialog box, select the number in the Germans Receive box, and then type the number of requisition points you want allocated to the Germans on Day 1. Select the number in the Russians Receive box, and then type the number of requisition points you want allocated to the Russians on Day 1. Click OK. You set the points for day two through the operation’s end day using the Scenario Info screen.
Repeat the second step for each day in your game, and then click OK.
Choosing the Commanders ’ Ranks
On the side of the screen with German data, click the cross corresponding to the rank you want to assign to the German Commander. On the Russian side, click the star corresponding to the rank you want.
Setting Ammunition Levels
The last step you complete on the Scenario Data screen is choosing each side’s ammunition level. Bear in mind that the more ammunition your teams have, the heavier their loads when they move.
On both the German and the Russian sides of the screen, click the Full Ammo, 80%, or 60% button.
After you’ve adjusted all the game settings on the Scenario Data screen, click Next to bring up the Map Info screen.
Editing Map Elements
The Map Info screen shows the default victory locations and deployment zones. You use this screen to add or change victory locations, modify the deployment zones, target your artillery barrage, and edit map data.
Adding, Moving, and Deleting Victory Locations
Victory locations appear in the Victory Location box in the upper-right corner of the Map Info screen. Victory locations are also displayed on the map as red-bordered boxes. When you click a victory location in the Victory Location box, that location is outlined in green on the map.
Each map in your custom game must have at least one victory location; no map can have more than eight victory locations. You can move, delete, or add victory locations.
To add a victory location
• Click the first map in your custom game (the map in the Scenario Map 1 box).
• Click the Victory Location button.
• Click the place on the map where you want to add the victory location. The Edit Victory Location dialog box appears.
• In the Location Name box, type a name for the new victory location.
• Complete the above steps for each map in your custom game.
To move a victory location
On the map, drag the victory location to a new position.
To edit or delete a victor y location
• On the map, double•click the victory location you want to edit or delete. The Edit Victory Location dialog box appears.
• To rename or assign and new value to the victory location, specify the new information, and then click OK.
• To delete a victory location, click Delete.
Editing Deployment Zones
Each map in Close Combat – Cross of Iron consists of Russian, German, and neutral deployment zones. You can use the scenario editor to redistribute territory as you choose. For example, if the Russians currently control a certain area of the map, you can give control of that area to the Germans instead.
You can edit the deployment zones only on the first map of a custom game. The deployment zones on subsequent maps are determined by the outcome of the preceding battle. The map on the Map Info screen is divided into tiles. Each tile contains an indicator that shows which side can deploy in that tile: a star for Russians, a cross for Germans, and an empty tile for neutral territory. To edit deployment zones:
• Set the map mode to the side to which you want to assign territory: click the Russian Deployment, German Deployment, or Neutral Deployment button.
• Click the tile on the map you want to reassign. The tile’s indicator shows its new designation, according to the side you chose in step 1. For example, if you assigned a former Russian tile to the Germans, the star in the center of the tile changes to a cross.
If you want to reassign a large number of tiles, you can drag over them instead of individually clicking each one.
• To change the map mode and assign territory to a new side, repeat step 1 by selecting a new side, and then repeat step 2.
Setting Barrage Coordinates
An artillery barrage is a concentrated delivery of artillery fire. In Close Combat – Cross of Iron, the barrage consists of two minutes of rocket fire (Katyushas) for the Russians or 150mm fire for the Germans. The Katyusha rounds tend to land in clusters, but they are not nearly as accurate as the German fire.
If you want to include an artillery barrage in your custom scenario, you need to decide where to target it. You can target up to four map coordinates for your barrage; you can target a barrage on every map in your custom game. The barrage is heavy enough to damage buildings and destroy tanks. The more locations targeted, the more dispersed and harder to avoid the barrage is.
To target your barrage
• Click the Barrage button.
• Click the map locations you want to target. You can target up to four locations.
Entering Scenario Information
The final step on the Map Info screen is entering scenario information. This step includes determining the game’s starting and ending maps and whether one side must control the map to win the battle.
You can also determine how many map requisition points will be awarded to each side when each map in your custom game is reached. Map requisition points are different from the day requisition points you chose on the Scenario Data screen. You receive day requisition points for each day in your game, regardless of whether you advance to another map. You receive map requisition points only when you advance to the next map.
To change the starting map
• In the Scenario Map boxes, click the map you want as your starting map, and then click Map Data. The Enter Scenario Information dialog box appears.
• Select the Starts on this map checkbox.
• Enter the number of map requisition points given to each side when they enter the map.
To change the end map
• The end map is the final map of an operation. In the Scenario Map boxes, click the map you want as your ending map, and then click Map Data. The Enter Scenario Information dialog box appears.
• Click the Ends on this map checkbox.
• Click either German Offensive, Russian Offensive, or Meeting Engagement. In the first two choices, the winning side needs to hold 80 percent or greater of the victory locations. For the Meeting Engagement choice, each side holds 50 percent.
To create custom battle briefing text
• In the Scenario Map boxes, click the map for which you want to create briefing text, and then click the Map Data button. The Enter Scenario Information dialog box appears.
• Click the German Battle Briefing text area, type the German briefing text you want, and then press TAB.
• Type the Russian briefing text you want, and then click OK.
To move to the next screen On the Map Info screen, click Next.
Selecting Forces
You use the next screen in the scenario editor to select the units that will fight for both the Germans and Russians. In most other respects, this screen (and the process of selecting forces) is the same as it is on the Requisition screen. It lists available troops, basic information about them, and what was pre-selected for you based on history. You can add or remove these units from your or your opponent’s troop list.
All unit types are available to you regardless of which map you choose to play.
To select whic h units will fight in the battle
• Choose the side whose forces you create by clicking either the German or Russian button.
The Online Experience
• Click the Team Availability button to choose which year’s forces you want displayed in the Force Pool box. You can choose any year during the war, or All to list all the forces available in Close Combat III.
• In the Force Pool box, double-click the unit you want to add to the Active Roster.
• Once you’ve chosen all the units you can (or want) for one side, click the name of the other side, and then pick teams for them.
Saving and Playing Custom Scenarios
When you save your custom scenario, you assign it a name to appear in the listing of previously defined custom scenarios on the Command screen:
• On the Force Info screen, click Next.
• In the dialog box that appears, type the name you want to give your custom game (up to 14 alphanumeric characters), and then click OK.
Your new scenario will be listed along with any other custom scenarios on the Command screen. You play the customized battle just as you would any other battle.
Copying Custom Games
Your custom games are saved in the \games\battles folder on your hard drive. If you want to give your battle to another player or copy it to another computer, just copy the battle from your computer and paste it into the \games\battles folder on the other computer.
When the other player starts Close Combat – Cross of Iron, the custom scenario will appear with any other custom scenarios on the Command screen
Posted: Thu Jun 30, 2011 10:22 pm Post subject: Re: Join the Cross of Iron Leaderboard
Thx guys. If any players would like join our Leaderboard just sign up. It troubles our members to see anyone in Gameranger who has Cross of Iron installed but have not signed up. We do not respect duty shirkers, lazy officers, drunkards, and defeatists. We are marching to the front. Who will we meet when we get there?
Officers resolve disputes among themselves in gameranger. If that fails, disputes will be resolved in a military court of law. Consult your Admin.
victory [vik-tuh-ree, vik-tree]
–noun, plural.
1. a success or triumph over an enemy in battle or war.
draw [dr-aw]
1. to make or be the same score; be equal in a contest: Draw requires rematch.
defeat [dih-feet]
–verb (used with object)
1. to overcome in a contest, election, battle, etc.; prevail over; vanquish: They defeated the enemy.
dispute (d-spyt)
v. dis·put·ed, dis·put·ing, dis·putes
1. To argue about; debate.
2. To question the truth or validity of; doubt: Her friends disputed her intentions.
3. To strive to win (a prize, for example); contest for: Our team disputed the visitors' claim to the championship.
4. To strive against; resist: disputed the actions of his competitors.
v.intr.
1. To engage in discussion or argument; debate. See Synonyms at discuss.
2. To quarrel angrily.
3. Getting screwed over in a ladder match exploit
n.
1. A verbal controversy; a debate.
2. An angry altercation; a quarrel.
You cannot post new topics in this forum You cannot reply to topics in this forum You cannot edit your posts in this forum You cannot delete your posts in this forum You cannot vote in polls in this forum You cannot attach files in this forum You can download files in this forum
In August of 2004, Zappi, Homba, Bambam887, RedScorpion and MOOXE all pitched
in to create this Close Combat site. I would to thank all the people who have visited
and found this site to thier liking. I hope you had time to check out some
of the great Close Combat mods and our forums. I'd also like to thank
all the members of our volunteer staff that have helped over
the years, and all our users that contributed to this site!